
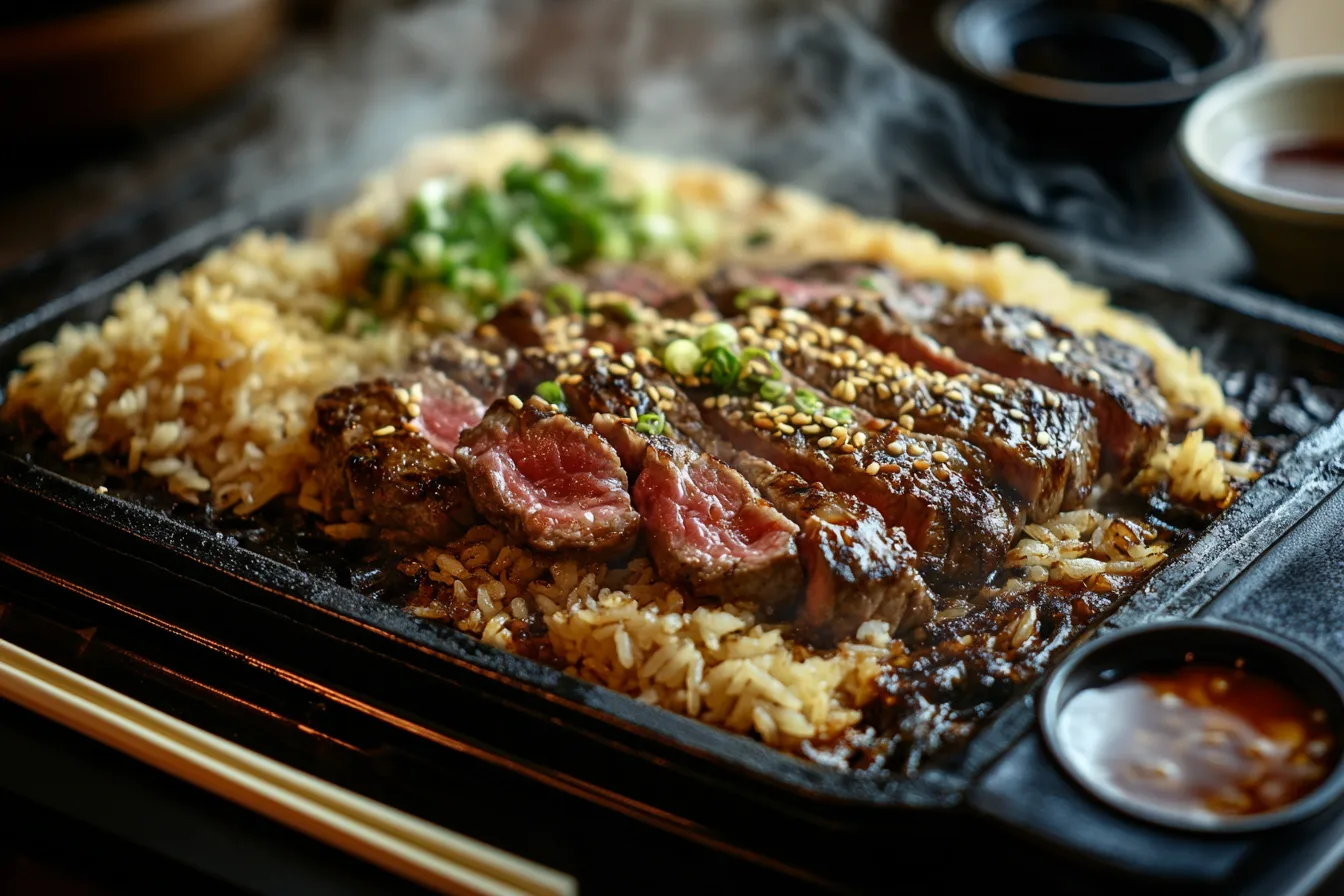
Better Than Takeout Hibachi Steak With Fried Rice
Introduction
Craving that sizzling Japanese steakhouse experience on a busy weeknight? You’re in luck! This easy hibachi steak recipe lets you recreate the magic of a hibachi grill at home – no chef tricks required. I used to think I had to go out for those tender steak bites and flavorful fried rice, but it turns out homemade hibachi is totally doable. In fact, my family insists this is the best hibachi steak they’ve ever had. It’s a quick Japanese dinner that’s a real crowd-pleaser – and yes, you can get it on the table faster than ordering takeout. With a quick 5-minute marinade prep and high-heat cooking, you’ll have a mouthwatering meal ready in a flash. Let’s dive into what makes this dish special (and truly better than takeout).
Why You’ll Love This Recipe
There are so many reasons to love this dish. It’s the kind of recipe that checks all the boxes for a busy home cook looking for flavor, speed, and nutrition. Why choose this hibachi steak and fried rice? Here are a few great benefits:
- Quick & Easy: This recipe comes together in about 30 minutes of cook time, making it perfect for weeknights. It’s faster than waiting for delivery – a lifesaver for quick dinner ideas when you want Japanese flavors in a hurry. An easy hibachi meal at home means less stress and more deliciousness.
- High-Protein & Healthy: Loaded with protein from steak (and eggs in the fried rice), this meal will keep you satisfied. It can be a very healthy recipe since you control the ingredients – use lean steak and plenty of veggies. It’s also naturally a gluten-free dinner if you use tamari instead of soy sauce. Want a low-carb Japanese meal? Swap in cauliflower rice (more on that later) to cut down the carbs.
- Budget-Friendly: Feeding a family at a hibachi restaurant can get pricey. Making this at home is much easier on the wallet. You’ll get generous portions of steak and rice for a fraction of the cost of restaurant hibachi. Plus, you probably have many of these pantry ingredients already (hello, soy sauce and rice!). It’s delicious homemade hibachi on a budget.
- Kid-Approved Flavor: The savory soy-garlic flavors and fun fried rice make this dish a hit with kids. There’s nothing super spicy (unless you add heat), and you can serve the yum yum sauce on the side so everyone can add as much as they want. It’s like bringing the Japanese steakhouse to your kitchen – a dinnertime show minus the flames. Picky eaters usually gobble this up, so it’s great for the whole family.
- Crowd-Pleaser for All: Whether you’re a foodie or a casual cook, this recipe impresses. It’s got something for everyone: tender seasoned steak, flavorful fried rice with veggies, and that addictive creamy sauce. The combination of textures and tastes will have your guests asking for seconds. It’s truly a restaurant-quality crowd-pleasing dinner that will make you proud you made it at home.
Ingredients You’ll Need
Let’s gather all the hibachi ingredients for our steak, fried rice, and signature “yum yum” sauce. Don’t be alarmed by the list – these are mostly kitchen staples. We’ll use imperial measurements for everything. I’ll also mention some ingredient swaps and additions so you can customize a healthy version or accommodate dietary needs (like a dairy-free hibachi night). Here’s what you need:
For the Steak & Marinade:
- NY Strip Steak – 1.5 pounds: Cut into bite-sized cubes (about 1 to 1½ inch pieces). This cut is tender and flavorful. Substitutions: You can also use sirloin (more budget-friendly) or ribeye (more marbling). For an extra-indulgent treat, filet mignon works too. If you prefer a different protein, chicken or shrimp can be used (cook times will vary). For a vegetarian twist, swap the steak with firm tofu cubes or meaty mushrooms (like portobello) marinated the same way.
- Low-Sodium Soy Sauce – 2 tablespoons: This forms the savory base of our marinade. Using low-sodium helps control saltiness. Gluten-free option: use tamari or coconut aminos instead of soy sauce to make the dish gluten-free.
- Sesame Oil – 2 tablespoons: Adds that distinct nutty aroma found in hibachi cooking. Substitute: if you don’t have sesame oil, use a neutral cooking oil or olive oil. (But try to get sesame oil next time – it really gives an authentic flavor.)
- Garlic – 4 cloves, minced: Freshly minced garlic infuses the steak with bold flavor. Garlic is a must for hibachi-style dishes.
- Ginger Paste – 1 tablespoon: This is basically minced ginger (you can use fresh ginger, finely grated). It gives a warm, zesty kick to the marinade. Tip: If you don’t have paste, use about 1 inch of fresh ginger root, minced. In a pinch, 1 teaspoon of ground ginger could work, but fresh is much better.
- Worcestershire Sauce – 1 tablespoon: A secret umami booster – it adds depth and savoriness to the marinade, complementing the soy. (Check your Worcestershire is gluten-free if needed, or omit it and add a splash of rice vinegar for a bit of acidity instead.)
- Honey – 2 tablespoons (optional): A touch of sweetness that helps the steak caramelize on the hot griddle and balances the salty soy. You can leave it out if you’re reducing sugar, but it does make the flavor pop. Sub: brown sugar or coconut sugar in a pinch.
For the Fried Rice:
- Cooked White Rice – 6 cups: Day-old rice works best (cold from the fridge). This is roughly the yield of 2 cups of uncooked rice. Long-grain rice like jasmine or basmati is ideal because it’s fluffy and not too sticky. Using cooled cooked rice is crucial – it’s drier, which helps us achieve that classic fried rice texture. (If you don’t have leftover rice, cook a fresh batch and spread it on a tray to cool quickly and dry out a bit.)
- Sesame Oil – 2 tablespoons: For frying the rice and veggies. You can use a bit of butter plus oil if you want extra richness, but we’ll also add butter later.
- Onion – 1 medium, diced: Yellow or white onion, finely diced. This adds aromatic flavor and a little sweetness once sautéed.
- Eggs – 3 large eggs: We’ll scramble these into the rice to create bits of fluffy egg throughout (like classic fried rice). They also boost the protein.
- Frozen Mixed Vegetables – 12 ounces: (about 1 bag), thawed and drained. The typical mix is peas, carrots, corn, and green beans. Using frozen veggies is a convenient shortcut for hibachi-style fried rice. Option: You can use fresh diced carrots, peas, and corn if you have them – just cook until tender. Feel free to add extra veggies too (like diced zucchini, mushrooms, or broccoli) for more color and nutrition.
- Low-Sodium Soy Sauce – 1/4 cup: This seasons the rice. Again, we use low-sodium soy to keep the salt in check. (Or tamari/coconut aminos for gluten-free.) You can adjust this amount to taste – start with less if you’re sensitive to salt, you can always add a splash more later.
- Butter – 2 tablespoons: This gets tossed in at the end of frying the rice for that authentic hibachi richness. Japanese steakhouses love to finish fried rice with butter for flavor and to help crisp it up. Dairy-free option: swap butter with a vegan butter or simply use a bit more oil.
- Garlic – 3 cloves, minced: More garlic for the fried rice (because you can never have too much garlic flavor!). We’ll add this toward the end so it doesn’t burn.
- Ginger – 1 tablespoon, minced or paste: More ginger to echo the flavors in the steak and keep the dish cohesive. Adding ginger to the rice really makes it taste like restaurant hibachi fried rice.
- Sesame Seeds – 1 tablespoon: These get sprinkled in for toasty flavor and a bit of crunch. You can use white or black sesame seeds. Lightly toasting them first will enhance their nuttiness (optional step).
- Salt and Pepper – to taste (optional): Because soy sauce is salty, you might not need extra salt. A dash of black pepper can be nice. You can always season at the end after tasting.
For the Yum Yum Sauce (Creamy Dipping Sauce):
- Mayonnaise – 1/2 cup: The base of the creamy sauce. Full-fat mayo gives the best flavor. Light option: use light mayo or half plain Greek yogurt to cut calories (the flavor will be a bit tangier with yogurt).
- Ketchup – 1/4 cup: Adds sweetness, tang, and the signature pink color to the sauce.
- Sriracha – 1 tablespoon: This is the source of the gentle heat in the sauce. 1 tbsp will make a mildly spicy, creamy sauce (the classic “yum yum” sauce has a little kick). Adjust to your spice preference: use 2 tsp for very mild or up to 2 tbsp for extra spicy. Alternatively: a pinch of cayenne or a few drops of hot sauce can be used.
- Salt – to taste: Just a pinch to enhance the flavors. Start with a little since the mayo and ketchup have salt; you can always add a bit more after mixing and tasting.
- Optional add-ins: A pinch of garlic powder, onion powder, or smoked paprika can be mixed into the sauce for additional flavor complexity. (Some hibachi sauce recipes use a dash of paprika and sugar – feel free to experiment to find the best yum yum sauce blend you love.)
Optional Toppings/Garnishes:
- Sliced Scallions (Green Onions): Sprinkle fresh green onion on top of the finished steak and rice for a pop of color and freshness.
- Extra Sesame Seeds: A little sprinkle on top makes for a pretty presentation.
- Lemon Wedges: Some folks like a squeeze of lemon over their hibachi steak for a bright note (totally optional but available at some restaurants).
- Additional Sauces: Serve extra yum yum sauce on the side and/or a soy-ginger sauce if desired for dipping.
Ingredient Swaps & Diet Substitutions: This recipe is easy to tweak for different diets. For a gluten-free hibachi meal, use tamari or coconut aminos in place of soy sauce and make sure your other condiments (like Worcestershire and ketchup) are gluten-free. To make it a dairy-free Japanese recipe, swap out the butter for more oil and use a vegan mayonnaise for the sauce – everything else is naturally dairy-free. Trying to cut fat or calories? Use a lean cut of steak (like top sirloin), reduce the oil/butter slightly, and try using half Greek yogurt in the sauce for a lighter healthy version. For vegetarians, skip the steak and increase the veggies or use tofu – you’ll still get a hearty, flavorful dish. This hibachi steak and fried rice is very flexible, so you can adjust it to your needs without any fuss!
Prep & Total Time
One of the best things about this recipe is how quickly it comes together. It’s a fantastic 30-minute meal (not counting the marinating time, which is mostly hands-off). Here’s the time breakdown:
- Prep Time: ~15 minutes (for slicing the steak, mixing the marinade, chopping onion, and whisking together the sauce).
- Marinating Time: at least 1 hour (you can go up to 24 hours in the fridge if you want maximum flavor – the longer, the better, but 60 minutes will do if you’re short on time). This is inactive time, so you can relax or prep other things while the steak soaks up flavor.
- Cook Time: ~15 minutes (everything cooks fast at high heat – about 10 minutes for the fried rice and just 3-5 minutes for the steak).
- Total Time: Approximately 30 minutes of active cooking, plus marinating. Even including the marinade, it’s much quicker than driving out for takeout!
In practical terms, you could marinate the steak the night before or in the morning, and then the cooking portion will easily fit into a busy evening. This dish definitely qualifies as one of those quick dinner ideas for weeknights. It’s hard to beat a delicious weeknight Japanese dinner that’s on the table with so little effort. Compared to restaurant hibachi (where you’d wait for a table and spend over an hour), or even ordering takeout (which can take 45+ minutes to arrive), this homemade version is faster. Your prep work (cutting, marinating, etc.) can be done ahead, so when it’s time to cook, you’re literally 15 minutes away from eating. Talk about a win for the home chef!
Recommended Kitchen Tools
You don’t need any fancy equipment or special Japanese cooking tools to make great hibachi at home. Basic kitchen essentials will do the job, though a couple of items can make the process smoother. Here are the best tools for hibachi cooking in your kitchen and why they’re useful:
- Large Skillet or Griddle: A wide, flat cooking surface is the star for hibachi-style cooking. If you have a cast-iron griddle or an electric tabletop griddle, that’s perfect – it mimics a restaurant hibachi grill. Otherwise, a big cast iron skillet or wok will work well. The key is to have plenty of surface area and the ability to get high heat. A large pan lets you spread the rice out to fry it and gives the steak room to sear, rather than crowding (which can cause steaming).
- Sharp Knife and Cutting Board: You’ll be cutting the steak into cubes and dicing vegetables. A good chef’s knife makes this easier and safer. Use a sturdy cutting board that won’t slip. This will help you slice the meat cleanly and chop the onion/other veggies quickly.
- Mixing Bowls (and Zip-top Bag): Use a bowl to whisk together the marinade, and another bowl for the yum yum sauce. You can marinate the steak in a bowl covered with plastic wrap, or use a gallon-size zip-top bag to marinate – the bag method helps the marinade coat the meat evenly and is easy to clean up (just toss the bag). Another small bowl will be handy to beat the eggs before they go into the rice (optional, you can beat them directly in the pan too).
- Whisk or Fork: To mix the marinade and to whisk the yum yum sauce ingredients until smooth. A small whisk ensures the honey and oils emulsify nicely. It’s also useful for scrambling the eggs.
- Spatula (Metal or Wooden Spoon): A sturdy spatula is essential for stir-frying the rice and flipping the steak pieces. In true hibachi fashion, a metal spatula (the kind you’d use on a griddle) works great to scrape up any bits and toss the rice. It can handle high heat and even help chop up ingredients on the fly. If you’re using a nonstick pan, use a wooden spoon or silicone spatula to avoid scratching.
- Tongs: Useful for placing and turning the steak bites if you prefer that over using the spatula. Tongs give you precision when searing those pieces of steak or when removing them from the pan.
- Measuring Spoons and Cups: To accurately measure out the soy sauce, oils, honey, etc. While cooking can be done by eye, it’s good to measure, especially the first time, so the flavors balance out perfectly (too much soy or sesame oil could overpower, so measure to get the best results).
- Optional – Rice Cooker or Instant Pot: Not required for the recipe itself, but useful if you want to cook your rice ahead of time with no fuss. If you eat a lot of rice, a rice cooker is a kitchen MVP. You could start rice in it earlier in the day, then refrigerate it until you’re ready to fry.
- Optional – Electric Griddle or Flat Top: If you happen to own an electric griddle (or the popular outdoor flat-top grill like a Blackstone), you can truly recreate a hibachi grill experience. You’ll have ample space to cook the rice and steak side by side. It’s also a fun way to serve guests (you can cook in front of them hibachi-style!). That said, if you don’t have one, a stovetop pan is perfectly fine.
- Small Bowls or Squeeze Bottles (for Sauce): When serving, it’s nice to have a small bowl for each person’s yum yum dipping sauce. If you’re channeling the hibachi chef vibe, you could use a squeeze bottle for drizzling the sauce in a fancy way. Totally optional but fun!
With these tools in hand, you’re ready to cook. Essentially, as long as you have a hot cooking surface, a good knife, and a spatula, you can make hibachi. No need for an actual hibachi grill – your kitchen stove will do the trick.
Step-by-Step Instructions
Ready to cook? Let’s walk through how to make hibachi steak and fried rice step by step. It’s simpler than you might think. We’ll tackle each component – the marinated steak, the restaurant-style fried rice, and of course the creamy yum yum sauce. Follow these instructions and you’ll have a complete hibachi dinner on your table in no time. Make sure to have all your ingredients prepped and within reach (this will go fast once you start cooking!). Pro tip: Hibachi cooking is quick, so doing a bit of prep (like chopping and measuring) before you turn on the heat will make the process smooth.
Step 1: Marinate the Steak
In a bowl, whisk together the soy sauce, sesame oil, minced garlic, ginger paste, Worcestershire sauce, and honey to create your marinade. Add the cubed steak pieces to the marinade and toss well to coat every piece. You can do this in the bowl or pour everything into a large zip-top bag and massage it around. Press out excess air if using a bag, and seal it. Place the marinating steak in the refrigerator for at least 1 hour (up to overnight). This gives the beef time to absorb all that garlicky, gingery, savory goodness. Pro Tip: If you have time, marinate overnight – the steak will be even more flavorful and tender. If you’re in a rush, try to marinate at least 30 minutes at room temperature (or 1 hour in the fridge). Also, when you’re ready to cook, let the steak sit out of the fridge for about 15 minutes so it’s not ice-cold – this helps it cook evenly.
Step 2: Prepare the Yum Yum Sauce
While the steak is marinating (or just before cooking), mix up the signature sauce. In a small bowl, combine the mayonnaise, ketchup, and Sriracha. Whisk until it’s smooth and pinkish-orange. Taste and add a pinch of salt if needed. If you want it sweeter, you can stir in a tiny bit of sugar or more ketchup; for more heat, add extra Sriracha. Once it’s to your liking, cover the bowl and refrigerate the sauce until serving time. Chilling it helps the flavors meld and it tastes more like the restaurant sauce. Pro Tip: Make the sauce ahead of time (even a day in advance). The flavor improves as it sits. Also, if you can get Japanese mayo (like Kewpie brand) it will give an even more authentic creamy taste. This creamy yum yum sauce is great on the steak and the rice, so you might want to double the batch if you love extra sauce.
Step 3: Cook the Fried Rice
When you’re ready to cook, heat up your large skillet or griddle on high heat. Let it heat for a good 2-3 minutes (or even 4-5 minutes if using a thick cast iron) – you want it really hot. Add 2 tablespoons of sesame oil to the hot surface. It should shimmer right away. Now add the diced onion and the cold cooked rice to the pan. Immediately also add the 3 eggs. Tip: you can crack and scramble the eggs in a bowl first, or just crack them directly onto the pan and quickly stir – on high heat they’ll scramble fast. Use your spatula to break up the egg and toss it with the rice and onions. Stir-fry this mixture for about 2-3 minutes, continually tossing and breaking apart any rice clumps. The egg will cook and coat the rice. Next, add in the thawed mixed vegetables. Continue to cook for another minute, mixing them into the rice. Now drizzle the 1/4 cup of soy sauce over the rice and veg. Add the 2 tablespoons of butter, the minced garlic, minced ginger, and sesame seeds. Stir everything together so the butter and soy sauce distribute and the garlic and ginger get fragrant. Keep stir-frying for about 5 more minutes, tossing occasionally. You want the rice to fry and get a slight golden-brown crust in places. Spread the rice out over the surface and let it sit for a minute without moving, then flip/toss – that’s how you get those toasty bits. Pro Tip: Use day-old cold rice! This is the golden rule for any fried rice. Fresh rice will turn out mushy. If you must use freshly cooked rice, make sure it’s cooled and somewhat dried out. Also, don’t overcrowd the pan – a single layer of rice helps it fry properly. If your pan is small, consider doing the rice in two batches. And resist the urge to stir constantly; allowing the rice to sit for short intervals helps it brown. High heat + minimal stirring = perfect fried rice with that restaurant-style lightly crispy texture.
Step 4: Sear the Steak
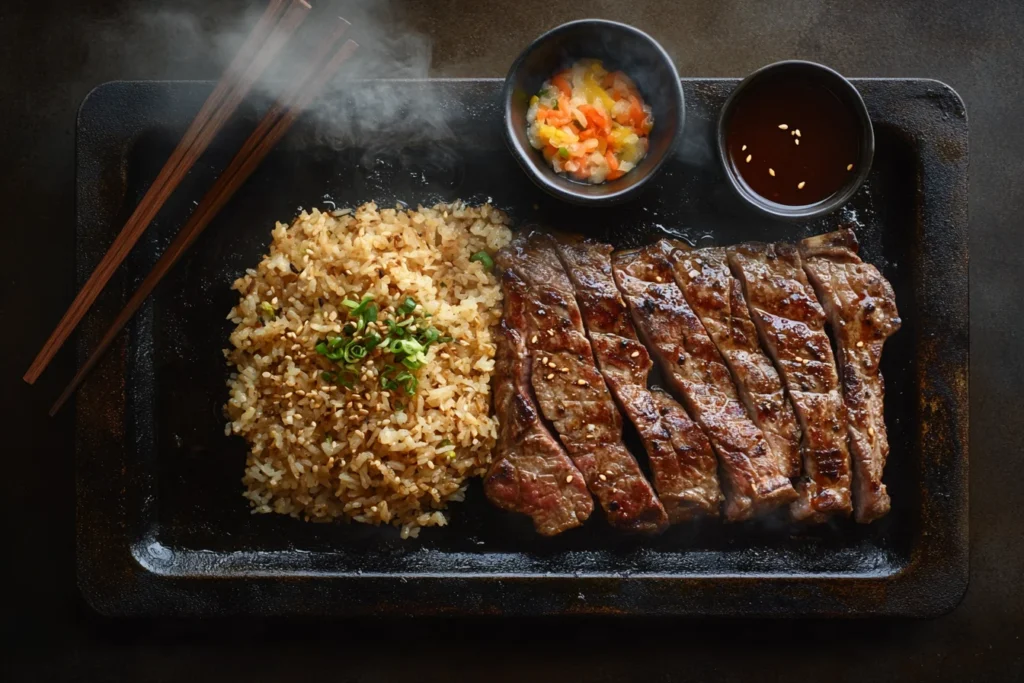
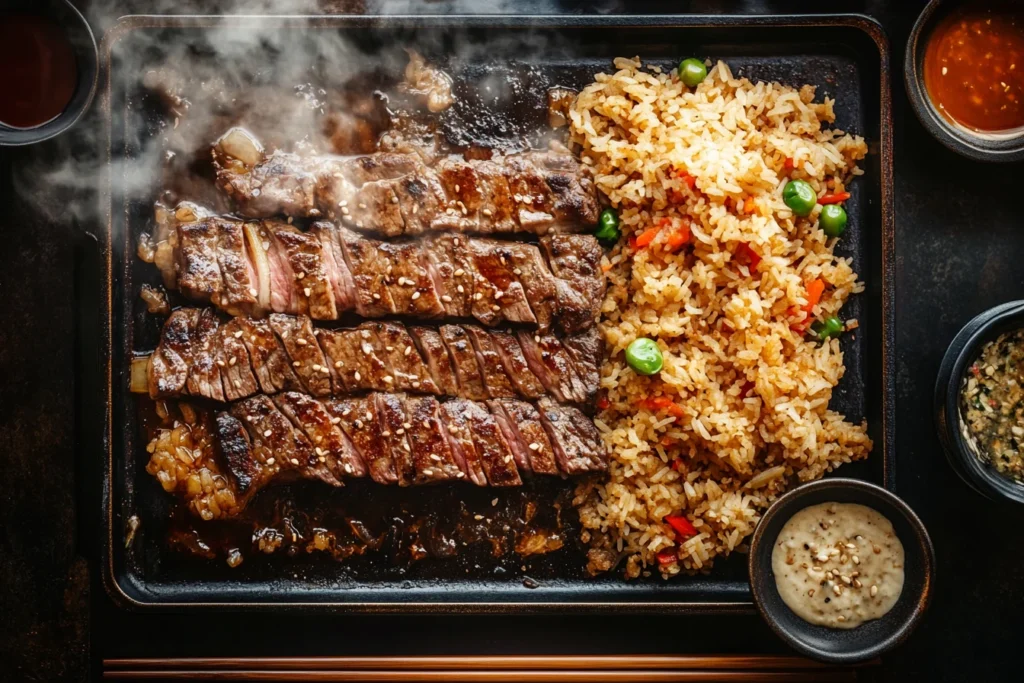
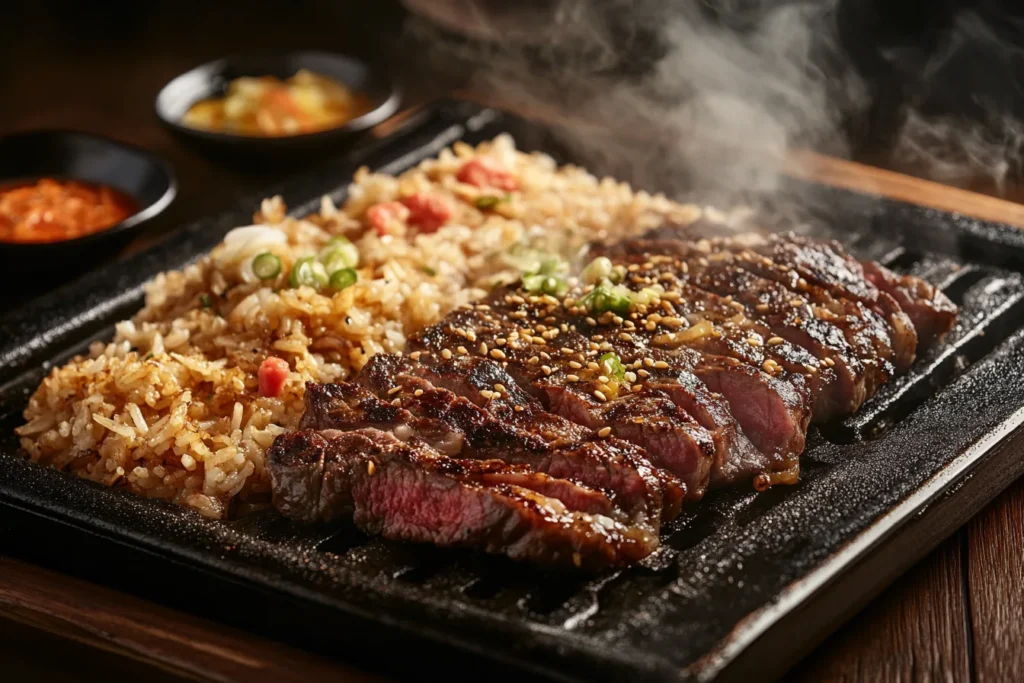
Now that your rice is fried to perfection, push it to one side of the griddle or pan to make room for the steak. (If your pan isn’t big enough, you can scoop the fried rice into a bowl and keep it warm – then use the pan for the steak. But on a large griddle, there’s usually space to do it simultaneously.) Drizzle a tiny bit more oil on the empty side of the pan if it looks dry. Add the marinated steak pieces in a single layer. They should sizzle immediately – that’s a good sign your pan is hot enough. Discard any excess marinade liquid (don’t pour the leftover marinade in, since it was touching raw meat and is too much liquid – you just want the steak itself to cook). Let the steak cook on the first side for about 2 minutes without moving them around; this allows a nice sear to form. Then flip the steak pieces (use tongs or your spatula) and cook for another 2 minutes or until your desired doneness. For medium steak, 3-4 minutes total is usually sufficient for small cubes. If you like it more well-done, cook an extra minute or two. You’ll notice the marinade caramelizing on the steak from the honey and high heat – that’s yummy flavor. Once the steak is browned on the outside and cooked to your liking, you can quickly toss the pieces in the pan to pick up any remaining sauce or browned bits. Now mix the steak and rice together on the griddle if you like, or simply turn off the heat. Dinner is ready! Serve the hibachi steak and fried rice hot, straight from the pan. Don’t forget to drizzle or dollop that yum yum sauce on top (or serve it on the side for dipping). Garnish with sliced scallions and an extra pinch of sesame seeds for presentation. Pro Tip: Avoid overcooking the steak – these bite-size pieces cook very fast. It’s better to slightly undercook (you can always cook them a tad more if needed) than to end up with tough steak. Also, if cooking in batches, don’t overcrowd the pan; too many pieces can lower the heat and prevent a good sear. If needed, cook the steak in two batches and then mix them back in. Finally, let the cooked steak rest for a minute off heat before serving (while you plate the rice) – this helps the juices redistribute so each piece stays juicy.
Now grab your plates and enjoy your homemade hibachi feast! You’ve just made a fantastic meal that tastes like a restaurant special. How awesome is it that you did it all in one pan in your own kitchen? 🎉
Nutrition Info (Per Serving)
This meal is not only delicious, it’s also packed with nutrients to fuel you. Here’s an approximate nutrition breakdown per serving (assuming the recipe makes 4 servings and includes the fried rice, steak, and sauce):
- Calories: ~1000 calories per serving
- Protein: ~50 g
- Carbohydrates: ~90 g (mostly from the rice; includes about 4-5 g fiber)
- Fat: ~45 g (mostly from the steak, eggs, mayo, and oils; includes ~12-15 g saturated fat)
- Cholesterol: ~250 mg (from steak and eggs)
- Sodium: ~1100 mg
Keep in mind these values are estimates. The numbers can vary based on the specific ingredients you use (for example, regular soy sauce will bump the sodium higher, a fattier cut of steak will add more calories, etc.). Compared to a typical restaurant hibachi dinner, this homemade version is often lighter. Restaurant hibachi meals often use more butter and oil (and sometimes even add sugar to the fried rice), which can drive up calories. They also tend to give very large portions of rice. By cooking at home, you can control the portions and ingredients.
For instance, ~1000 calories for a full steak-and-rice meal with sauce is pretty reasonable, considering it’s a whole dinner. In contrast, a takeout hibachi steak with fried rice and yum yum sauce could easily be 1200+ calories, and loaded with sodium (some estimates run over 2000 mg sodium!). Here, we used low-sodium soy sauce and a measured amount of butter. If you want to lighten it up further, you can portion out a bit less rice or use cauliflower rice to cut carbs. On the flip side, this recipe is high in protein (around 50 grams), which is excellent for a satisfying meal and building muscle. You’re also getting some vitamins from the veggies (plenty of vitamin A from the carrots and peas, and vitamin C, etc.).
Healthier swaps: If you’re watching your intake, remember you can make swaps without sacrificing flavor – e.g., use lean sirloin, low-carb rice alternatives, and light sauce options as noted in our Healthy Variations section. Overall, this dish provides a nice balance of macros: protein for satiety, carbs for energy, and fats for flavor. It’s definitely possible to enjoy hibachi at home as part of a healthy diet.
Healthy Variations
Want to put an even healthier spin on this hibachi steak and fried rice? No problem! The recipe is very adaptable, and with a few tweaks you can make it suit a variety of nutritional goals or diets. Here are some healthy hibachi variations and tips for a clean-eating Japanese meal:
- Make It Low-Carb or Keto-Friendly: The biggest source of carbs here is the rice. To create a low-carb fried rice, simply replace the rice with riced cauliflower. You can buy pre-riced cauliflower (fresh or frozen) or make your own by pulsing florets in a food processor. Sauté the cauliflower “rice” just like in the recipe, but note it will cook much faster (just a few minutes to tenderize, and it won’t quite crisp up like rice). Another option is to do half cauliflower rice and half brown rice, to retain some rice texture while lowering carbs. Using cauliflower rice can drop the carbs to virtually nil and slash calories, making this a very light meal.
- Use Brown Rice or Quinoa: If you prefer whole grains, use brown rice instead of white. Brown rice adds fiber and nutrients, making the meal more wholesome. Just be sure to cook it fully and cool it – day-old brown rice works for fried rice too. Quinoa could even work for a protein-boosted “fried quinoa” version of this dish.
- Lean or Plant-Based Proteins: While steak is delicious, you can swap it for leaner proteins to reduce saturated fat. Try chicken breast or turkey tenderloin cut into bite-size pieces (you can marinate and cook them the same way; they’ll cook through in about the same time). Shrimp is another lean option – it cooks very quickly and has lots of protein with minimal fat. For a plant-based take, use firm tofu (press it to remove water, then marinate; it will soak up flavor and you can pan-fry it until golden) or even edamame for protein. These changes make the dish lighter but still filling.
- Lower the Sodium: Watching salt? You’re already on the right track using low-sodium soy sauce. To go further, you can substitute coconut aminos for soy sauce entirely – it’s much lower in sodium and still provides that salty-sweet umami. Also, use unsalted butter or just omit the butter and use an extra dash of olive oil instead. Taste as you go, and you might find you can use even less soy sauce in the rice and still have plenty of flavor, thanks to the garlic, ginger, and sesame oil. Another tip: add a squeeze of lemon or lime at the end – acid can enhance flavors in place of some salt.
- Cut Back on Added Fats: We love the sesame oil and butter for flavor, but you can reduce the amounts a bit if you need to. For example, use 1 tablespoon of oil instead of 2 for the fried rice, and 1 tablespoon of butter instead of 2, and use a nonstick pan so nothing sticks. The dish will still turn out tasty with slightly less fat. You can also choose heart-healthy fats: swap in avocado oil or olive oil for cooking. They handle high heat well and are healthier alternatives.
- “Light” Yum Yum Sauce: The sauce is mayonnaise-based, which is delicious but calorie-dense. To lighten it, try using half mayo and half plain Greek yogurt – this maintains the creamy texture but cuts fat and adds protein. Another trick: use a light mayonnaise made with olive oil. And if you really want to lean out the sauce, there are even fat-free mayo substitutes, though the flavor isn’t as rich. Start with small changes: even using 2/3 mayo and 1/3 yogurt will make a difference. Also, you can simply serve less sauce per person – a little drizzle can go a long way to add flavor without too many calories.
- Extra Veggies, Less Rice: Boost the nutrition by increasing the veggie-to-rice ratio. Throw in additional vegetables like broccoli florets, sliced mushrooms, bell peppers, or zucchini. The more veggies, the more fiber, vitamins, and overall volume (so you feel fuller on fewer calories). You can cut back the rice to 4 cups instead of 6 and add an extra couple cups of mixed veggies – you’ll get a veggie-packed hibachi fried rice. It’s a great way to sneak in more servings of vegetables for a healthy version of this meal.
- Grill Instead of Fry: If you want to reduce oil usage, you could even try grilling the steak on an outdoor grill (for that charred flavor without added fat) and just make the fried rice on the side with minimal oil. Grilled steak and a lighter fried rice could be a combo for the health-conscious who still want big flavor.
- Portion Control: This recipe makes about 4 generous servings. If you’re aiming for lower calorie intake, you can divide it into 5 or 6 smaller portions and serve with a side salad or extra veggies. Sometimes just eating a bit less rice and more salad can turn a heavy meal into a lighter one while still enjoying all the flavors.
Remember, healthy hibachi doesn’t mean bland! Even with these tweaks, you’ll get that yummy garlic-ginger taste and satisfying protein. Feel free to mix and match these suggestions to create a version of the recipe that aligns with your health goals or dietary needs. It’s all about balance and personalizing your cooking.
Serving Ideas
Now that your hibachi dinner is ready, how should you serve it? Of course, it’s fantastic all on its own as a one-pan meal, but you can definitely get creative. Here are some serving ideas, accompaniments, and fun touches to elevate your hibachi steak with fried rice:
- Serve Teppanyaki-Style: For the full experience, serve the steak and fried rice straight off the griddle onto plates. If you cooked on a portable electric griddle, you could even bring it to the table (carefully) and serve your family or guests as a personal hibachi chef! Hand out some chopsticks for authenticity. It’s a fun party food idea if you’re hosting – you can cook in front of your guests for some dinner entertainment.
- Extra Sauces: While yum yum sauce is the classic, some hibachi fans love a more tangy, savory option. This Japanese-style ginger dipping sauce is another great choice to serve on the side (for example, mix soy sauce, a little rice vinegar, minced ginger, and a touch of sugar). Spicy mayo or even a splash of teriyaki sauce are other condiments people might enjoy. Having a variety of sauces lets everyone customize their plate.
- Add a Starter or Side: To make it a complete hibachi restaurant-style meal, you could start with a light miso soup or a simple salad with ginger dressing (just like the ones you get at hibachi restaurants). The soup can be as easy as mixing instant miso paste with hot water, and the salad could be iceberg lettuce with a store-bought ginger dressing or homemade one. Another side idea: edamame (steamed soybeans) sprinkled with salt – a fun finger food to nibble on before or alongside the meal.
- Include Hibachi Veggies: We have veggies in the fried rice, but you can also serve additional hibachi-style vegetables on the side. Common ones are zucchini, mushrooms, broccoli, and carrots. You can sauté these on the same hot pan with a little soy sauce and butter until tender-crisp. Serve them alongside the steak and rice for more color and to get those greens in. This makes the meal even more of a crowd-pleasing dinner because you’re offering a balanced plate.
- Surf and Turf Upgrade: If you want to impress (or just treat yourself), add shrimp to the menu! Hibachi often includes a mix of steak, chicken, shrimp, etc. You could marinate some jumbo shrimp with a bit of garlic, salt, and pepper (or a splash of the steak marinade) and cook them on the hot griddle for 2 minutes per side until pink and slightly charred. Serve the grilled shrimp alongside your steak for a homemade surf-and-turf hibachi. This is great for a special occasion dinner.
- Bento Box Lunch: Planning on leftovers or meal prepping? The steak and fried rice make awesome meal prep lunch bowls. Pack them into containers (the rice in one section, steak in another) and include a small lidded cup of yum yum sauce. These will keep in the fridge and you can reheat for a quick lunch. You can even get creative and pack them in bento-style lunch boxes for a fun presentation – it’s like a homemade Japanese bento. If you want to add variety, include a few sushi rolls or a side of pickled ginger in the box.
- Lettuce Wraps: For a lighter way to enjoy leftovers or just a different serving style, use large lettuce leaves (like romaine or iceberg cups) as wraps. Spoon some fried rice and a couple of steak pieces into the leaf, drizzle with sauce, wrap it up and eat it like a taco. It’s a fresh twist that adds crunch and can reduce the carb load a bit. These “hibachi lettuce wraps” could be a cool appetizer idea too when entertaining.
- Drinks: Pair your hibachi feast with a fitting beverage. For a non-alcoholic route, iced green tea or a sparkling yuzu lemonade would complement the meal. If you want something alcoholic, consider a cold Japanese beer (like Sapporo or Asahi) to go with the savory flavors. Sake (Japanese rice wine) served warm or a light white wine are also nice pairings with steak and rice.
- Family Style Platter: Serve the steak and fried rice on a big platter or in a large bowl family-style. Sprinkle the scallions and sesame on top. Let everyone scoop their own portion. This makes for easy, communal dining. You can keep extra sauce on the side for people to help themselves. This dish is truly a crowd-pleaser, so if you have a bigger group, double the recipe and serve it buffet style at a party or potluck. People will flock to it!
No matter how you serve it, don’t forget to have fun. Part of the joy of hibachi is the lively atmosphere. So maybe put on some upbeat music, grab those chopsticks, and enjoy your homemade hibachi steak night. You’ve earned the title of at-home hibachi chef!
Mistakes to Avoid
Even with a foolproof recipe, there are a few pitfalls to watch out for. Here are some common hibachi mistakes home cooks might encounter and how to troubleshoot or avoid them. Keep these cooking tips in mind to ensure your hibachi steak and fried rice turn out perfectly:
- Mistake 1: Using warm, freshly cooked rice. If you try to make fried rice with rice that’s just been cooked (and is still hot or moist), you’ll likely end up with clumpy, soggy rice. Fix: Always use day-old, cold rice for fried rice. It fries up better and avoids a mushy texture. Here’s a great primer on how to make perfect fried rice if you want more technique tips.
- Mistake 2: Overcrowding the pan. Putting too much rice or steak in a pan that’s too small will trap moisture and cause steaming instead of searing. This means no crispy fried rice and grey, boiled meat – not what we want. Fix: Use the largest pan or griddle you have so you can cook things in a single layer. If necessary, cook in batches. For example, fry the rice in two batches or cook the steak in two rounds, then combine. It’s better to take a little extra time than to overcrowd and ruin the texture.
- Mistake 3: Not preheating enough (or using low heat). Hibachi cooking is all about high heat. If your pan isn’t hot, the ingredients will just slowly sweat and turn mushy. Fix: Get that skillet really hot before adding anything. You should see the oil shimmer and hear a loud sizzle when food hits the surface. High heat ensures the rice fries (not stews) and the steak sears nicely on the outside. If you’re afraid of burning, just keep an eye on it and stir frequently, but don’t turn the heat down too much. A properly heated pan is one of the biggest hibachi troubleshooting points – it makes all the difference.
- Mistake 4: Overcooking the steak bites. Small cubes of steak cook rapidly. If you leave them on too long, they can go from tender to tough. Fix: Sear the steak for just a few minutes. Remember that the steak will continue to cook a tad from residual heat even after you remove it from the pan. If you like your steak medium, aim to take the pieces off when they are medium-rare; they will finish cooking as they rest for a minute. Also, cut your steak pieces evenly – if some are much larger than others, they won’t cook at the same rate.
- Mistake 5: Skipping or short marinating. If you toss the steak in the marinade and immediately cook it, you won’t get the depth of flavor that makes hibachi steak so tasty. Fix: Give it time to marinate. At least an hour is recommended. If you know you’ll be short on time, cut the steak into smaller pieces (smaller cubes will soak up marinade quicker) and/or let it marinate at room temp for 30 minutes which marinates faster than in the fridge (just don’t leave raw meat out too long; 30 min is fine). Better yet, plan and marinate earlier. This step is where a lot of the flavor comes from, so it’s worth doing right.
- Mistake 6: Adding too much soy sauce (or using regular soy without adjusting). It’s easy to get heavy-handed with the soy sauce, but too much can make your rice mushy and overly salty. Fix: Stick to the amount in the recipe (1/4 cup for the rice) to start. You can always add a splash more at the end if it needs it, but you can’t take it out if you add too much. Also, use low-sodium soy sauce as called for, or cut the quantity if using full-sodium. Remember the yum yum sauce will also contribute saltiness when eating, so moderate the soy during cooking.
- Mistake 7: Burning the garlic or ginger. These aromatics can burn quickly, especially on a hot grill, and burnt garlic can taste bitter. Fix: Notice in the instructions we add minced garlic and ginger after the rice has cooked a bit and along with some liquid (soy sauce) and butter. This prevents them from sitting on a hot surface alone for too long. If you find your pan is very hot, you can push rice aside and sauté the garlic/ginger in a little butter in a corner where it’s slightly cooler, then mix in. Stir continuously once you add them – 30 seconds to a minute is enough to release their fragrance. Add them towards the end of cooking rather than at the very start.
- Mistake 8: Using unthawed (still frozen) veggies. Tossing frozen vegetables straight into the pan will release a lot of water and cool down your hot pan, undoing all your high-heat efforts. Fix: Make sure your frozen mixed veggies are fully thawed and drained of excess water. Pat them dry if they seem wet. You can quickly thaw frozen veggies by microwaving for a minute or running under cold water and then draining. Adding them at room temp will keep your pan hot and frying, not steaming.
- Mistake 9: Neglecting to taste and adjust. Sometimes home cooks forget that tasting as you go is important. You might under-season the rice or sauce if you don’t taste it. Fix: Give the fried rice a quick taste once it’s cooked. Does it need a pinch more salt or another dash of soy? How about a crack of pepper? Same with the sauce – taste it and balance the sweetness/spice to your liking. Everyone’s palate is different, so those final adjustments can take your dish from good to great.
- Mistake 10: Forgetting to have fun! The joy of hibachi is partly the playful cooking process. If you’re too stressed, you might rush or miss a step. Fix: This one’s easy – enjoy the process! Do a little spatula flip (safely), pretend you’re the hibachi chef, involve your family by telling them to “ooh and aah” at your skills. Cooking should be enjoyable. When you’re having fun, the food often tastes better because you put love into it.
By keeping these common mistakes in mind, you’ll avoid hiccups and be able to troubleshoot any issues that arise. Soon, you’ll be so comfortable with hibachi cooking that it will become second nature. And if something doesn’t turn out perfect the first time, don’t worry – learn from it and try again. Practice makes perfect (even for hibachi at home).
Storage & Make-Ahead Tips
If you somehow don’t polish off this delicious meal in one go (or if you’re planning ahead), here’s how to store leftovers and even prep parts of the recipe in advance. Proper storage will ensure your hibachi steak and fried rice stay tasty, and reheating correctly will bring them back to life without losing quality. These are essential storage tips for any meal prep dinner with hibachi:
Make-Ahead Components: You can prepare several parts of this recipe ahead of time to make dinnertime a breeze:
- Marinate Ahead: The steak can sit in its marinade in the fridge overnight (in fact, it’s encouraged for flavor). If doing so, I like to pop it into the marinade the night before or morning of the day I’ll cook it. Then it’s just grab-and-cook come dinner.
- Cook Rice Ahead: Fried rice is best made with day-old rice, so this is a no-brainer – cook your rice a day (or up to 3 days) in advance. Once it’s cooked, cool it and store it in the fridge. If you have leftover plain rice from another meal, even better – repurpose it for this recipe.
- Prep Veggies and Aromatics: You can dice your onion, mince garlic, and ginger ahead of time. Store them in sealed containers in the fridge (garlic and ginger can be kept together). Having those ready to go will save you minutes when cooking.
- Mix the Sauce: Yum yum sauce can be made 2-3 days ahead. In fact, it gets better after chilling a while. Keep it in a sealed jar or container in the refrigerator. Give it a good stir before serving, as slight separation can occur over time.
- Everything Ready: Basically, you could have everything except the actual cooking done ahead: steak marinated, rice cooked, veggies chopped, sauce made. Then when it’s time to eat, you just heat the pan and execute the cooking steps. This makes it totally feasible to enjoy on a super busy night or to whip up quickly for guests.
Storing Leftovers: If you have cooked leftovers of steak, fried rice, or sauce, here’s how to store them:
- Refrigerate: Let everything cool to near room temperature (don’t leave it out more than an hour). Then transfer to airtight containers. It’s best to store the steak and fried rice separately from the sauce. In the fridge, the steak and rice will last about 3 to 4 days. The sauce will last about 5 to 7 days (since it’s mayo-based, treat it like you would an open jar of mayo).
- Keep Rice and Steak Separate (Optional): If you plan to reheat, storing the rice apart from the steak can be useful. The rice might reheat better on its own (you can add a touch of moisture) and the steak can be reheated gently. But it’s not a must – if you mixed it all together and want to store as a single dish, that’s fine too.
- Freezing: Yes, you can freeze this dish! Fried rice freezes surprisingly well. Place the fried rice in a freezer-safe zip-top bag or container. For the steak, do the same (separate bags for rice and steak is ideal). Try to remove excess air from the bags to prevent freezer burn. You can freeze them for up to about 2 months for best quality. The sauce, however, does not freeze well (mayonnaise tends to separate when frozen), so just make fresh sauce when you plan to eat the frozen leftovers.
- Label & Date: Don’t forget to label your containers with the date. It’s easy to forget when you froze something.
Reheating Tips: When you’re ready to enjoy the leftovers, proper reheating will make a big difference, especially for the fried rice:
- Reheating Fried Rice: The best method is to re-fry it in a skillet. Heat a little oil or butter in a pan over medium-high heat, add the leftover rice and stir-fry until it’s hot and re-crisped. This brings back that original texture nicely (and you can toss in a dash of soy if it seems a bit dry). If you’re in a hurry, you can microwave the fried rice – sprinkle a tablespoon of water over it, cover loosely, and microwave until steaming hot, stirring once. The microwave method makes it hot but may make it a bit softer; the stovetop method keeps it closer to fresh taste and texture.
- Reheating Steak: Steak is tricky because it can overcook when reheated. The goal is just to warm it. In a pan: heat a teaspoon of oil over medium heat, add the steak pieces, and stir for just 1-2 minutes until warmed through. You can also splash a little water or beef broth in and cover the pan briefly to warm them gently. In the microwave: use a lower power (50% power) for short bursts, checking often so you don’t turn it rubbery. Just heat until it’s warm enough. If you originally cooked the steak to medium, reheating may bring it to medium-well, but it will still be tasty if not overheated.
- Reheating from Frozen: For rice, it’s best to thaw overnight in the fridge, then follow the above methods. If you must microwave from frozen, use a defrost setting first. For steak, definitely thaw overnight if possible for best results. Or reheat frozen steak in a covered pan on very low heat until thawed and then slightly sear at the end.
- Refreshing the Dish: Leftovers sometimes need a flavor boost. When reheating, you can add a dash of soy sauce or a pat of butter to refresh the taste. Throwing in a fresh clove of minced garlic or a bit of ginger while reheating the rice can also revive that aromatic punch. And don’t forget a drizzle of fresh yum yum sauce – that fixes everything! If the sauce thickened in the fridge, let it come to room temp or stir in a drop of water to loosen it up.
With these make-ahead and storage strategies, you can enjoy this make-ahead hibachi meal anytime. It’s great for meal prep – cook it on Sunday and portion it out for lunches. Or freeze half for a convenient dinner later in the month. Having some homemade “better than takeout” hibachi in your freezer is like money in the bank on a night when you’re too tired to cook from scratch.
Conclusion
There you have it – a full hibachi steak and fried rice experience better than takeout, right from your own kitchen. From the tender marinated steak bursting with garlicky, savory flavor to the golden fried rice and that irresistible creamy sauce, this dish truly delivers on taste and fun. The best part is how easy it all comes together, making it an easy Japanese meal you can whip up any time. No special skills or equipment required, just a willingness to try something new and enjoy the process.
This recipe is a crowd-pleasing dinner for sure. I love how it brings people together – whether it’s your family gathered around the stove as you channel your inner hibachi chef, or friends at a dinner party building their plates with excitement. It’s interactive, flavorful, and unique compared to the usual weeknight dinners. And knowing that it’s homemade means you can feel good about the ingredients and save some money while you’re at it.
So, the next time you’re craving hibachi or looking to impress guests with something different, give this a try. I’m confident you’ll be amazed that you created something that tastes like it came from a Japanese steakhouse. It really is better than takeout!
If you try this recipe, I’d love to hear how it went for you. Did you do a fun onion volcano or add your own twist? Let me know in the comments below, and feel free to share your hibachi at-home stories. Enjoy every bite of your delicious creation – you just made an epic meal that’s sure to become a repeat favorite. Happy cooking (and eating)!
FAQ
Can I use a different cut of steak?
Absolutely! You don’t have to use NY strip if you have another steak on hand. Gluten-free hibachi marinade tip: Many cuts work well – sirloin is a great choice (lean and flavorful), ribeye will give you extra richness from the marbling, and filet mignon offers super tenderness. Even cheaper cuts like flank or flat iron can work if you cut them thin and marinate a bit longer to tenderize. Just adjust cooking times for thicker or thinner pieces. Also, feel free to mix proteins – you can do a combo of steak and chicken or shrimp to recreate a hibachi combo. The marinade and method work for those as well (just cook chicken through fully, and shrimp until pink and curled).
Is this recipe gluten-free?
It can be! The core ingredients (rice, steak, eggs, veggies) are gluten-free. The main thing to watch is soy sauce, which contains wheat. To make a gluten-free dinner version, use tamari or coconut aminos instead of regular soy sauce (here’s a helpful breakdown of is soy sauce gluten-free from Healthline). Also, check your Worcestershire sauce – some brands contain a small amount of malt vinegar (from barley). There are gluten-free Worcestershire sauces available, or you can omit it from the marinade if needed. Ketchup and mayo are usually gluten-free, but it’s always good to double-check labels if you have a severe sensitivity. Once those swaps are made, you’ve got a totally gluten-free hibachi meal! It’s one of the perks of cooking at home – you can enjoy “hibachi” without any hidden gluten that might be in restaurant sauces.
Can I make it dairy-free?
Yes, this is easy to do since there’s not much dairy to begin with. The only dairy in the recipe is the butter in the fried rice (and if you choose to use standard mayo, note that mayonnaise is dairy-free – it’s made from eggs and oil, not milk). To make a dairy-free Japanese recipe version, simply substitute the butter with an equal amount of oil or use a plant-based butter spread. The rest of the recipe is already dairy-free. If you want to go a step further for an entirely animal-free approach, use vegan mayonnaise for the sauce – that would make the yum yum sauce dairy-free and egg-free. So with those minor tweaks, this dish can be 100% dairy-free and still completely delicious.
How can I make it spicy?
If you love some heat and want a spicy hibachi experience, there are a few ways to amp it up. First, you can increase the Sriracha in the yum yum sauce or simply drizzle extra Sriracha on your portion. That sauce is a great vehicle for spice. Secondly, you could add chili flakes or a dash of hot chili oil into the fried rice as you cook it. Even stirring in a teaspoon of sambal oelek (an Asian chili paste) or a chopped hot pepper with the garlic and ginger will give the entire dish a kick. Another idea: make a spicy garlic butter to finish the rice or steak (melt butter with a bit of minced garlic and cayenne pepper). Lastly, serving with a side of spicy mayo or a sprinkle of wasabi powder can light a fire for those who dare. The recipe as written is mild (kid-friendly), but it’s very easy to turn up the heat to your liking!
Can I use cauliflower rice instead of regular rice?
Definitely. Using cauliflower rice is a fantastic option for those looking to cut carbs or sneak in extra veggies. To make cauliflower fried rice, take about 6 cups of riced cauliflower (store-bought fresh or frozen, or pulse a head of cauliflower in a food processor to make your own rice-sized pieces). Stir-fry it in the same way you would regular rice. A couple of pointers: Cauliflower rice will release some water as it cooks, so use a high heat and do not add water. You might want to cook the cauliflower a minute or two less than regular rice – it can go from firm to soft quickly. You won’t need to pre-cook it (unlike real rice). Just toss it in with the onions and eggs. You may also want to use slightly less soy sauce since cauliflower doesn’t absorb liquid quite like rice – start with 2 tablespoons and add more to taste. The result will be a lighter, veggie-packed “fried rice” that’s low-carb and still yummy. It won’t crisp up quite the same as day-old rice, but it will get some color and a nice fried flavor. Many readers have enjoyed this recipe with cauliflower rice for a lighter twist.
Can I prep it ahead or meal prep this dish?
Yes, many elements of this recipe are perfect for prepping ahead of time. You can marinate the steak the night before (the longer marinade will only improve the flavor). The sauce can be made days in advance, as mentioned. You can also cook your rice a day or two before (or use leftover rice from another meal). If you want, you could even fry the rice earlier in the day and just reheat it (though fresh off the pan is best). Chopping veggies in advance is a smart move too. For meal prep, this hibachi steak and fried rice is awesome – cook everything, let it cool, then portion it into individual microwave-safe containers. Keep the yum yum sauce in a separate small container. It will stay good refrigerated for a few days. When you want your meal, just reheat (see the Reheating Tips above for best methods) and either drizzle the sauce after reheating or use it as a dip. If you’re prepping components, the make-ahead hibachi strategy is to have all ingredients ready so the final cooking is quick and easy. Many busy readers marinate in the morning and then cook at dinner time in under 20 minutes. However you do it, this recipe is friendly to planning ahead.
What’s the best way to reheat leftovers?
The best way to reheat hibachi leftovers is to mimic the original cooking method – that means high heat for the rice, and gentle heat for the steak. For the fried rice, toss it in a hot skillet with a touch of oil or butter and sauté until it’s heated through. This will revive any lost crispness and make the rice taste freshly made. If you’re in a rush, microwaving is fine: add a sprinkle of water, cover, and microwave until hot, stirring once or twice. For the steak, you want to avoid overcooking it. Reheat the steak pieces separately in a pan over medium heat just until warmed (or microwave on 50% power in short bursts). You can even reheat the steak and rice together on the stove by clearing a space to heat the steak gently, then mixing everything. One more reheating tip: add a little splash of soy sauce or a small dab of butter when reheating to re-moisten and flavor boost the dish. And always store your yum yum sauce separate – use it cold or room temp; there’s no need to heat the mayo-based sauce (in fact, don’t microwave the sauce or it can separate). By following these reheating tips, your leftovers will taste almost as good as the fresh meal.