
Layers of Love: This Strawberry Cheesecake Cake Will Ruin You for All Other Desserts!
Introduction
Have you ever found yourself torn between two desserts at a party? I sure have – especially when the choices are creamy cheesecake and fresh strawberry shortcake. So, I decided to solve this sweet dilemma in one go. Enter the “Layers of Love” Strawberry Cheesecake Cake, a decadent mashup that combines two of the best treats on Earth into one showstopping homemade dessert. Fun fact: strawberries are a fantastic source of vitamin C and even pack nutrients like folate and potassium – that means we can pretend this cake has a little health benefit, right? 😉
This easy strawberry cheesecake cake is special for so many reasons. First, the flavor is out of this world: you get the tangy, velvety cheesecake and the fluffy strawberry cake all in one bite. The texture is a dreamy contrast between the creamy cheesecake layer and the tender crumb of the cake layers. And guess what? It’s shockingly simple to make. With a few clever steps, you can have the best cake recipe ready to impress. Honestly, I whipped this up on a whim for a family get-together, and it turned into a 5-minute dessert disappearing act – every last crumb was gone in minutes. It’s safe to say this treat is the ultimate crowd-pleaser. One slice of this “Layers of Love” cake and you’ll be ruined for all other desserts (sorry, not sorry)!
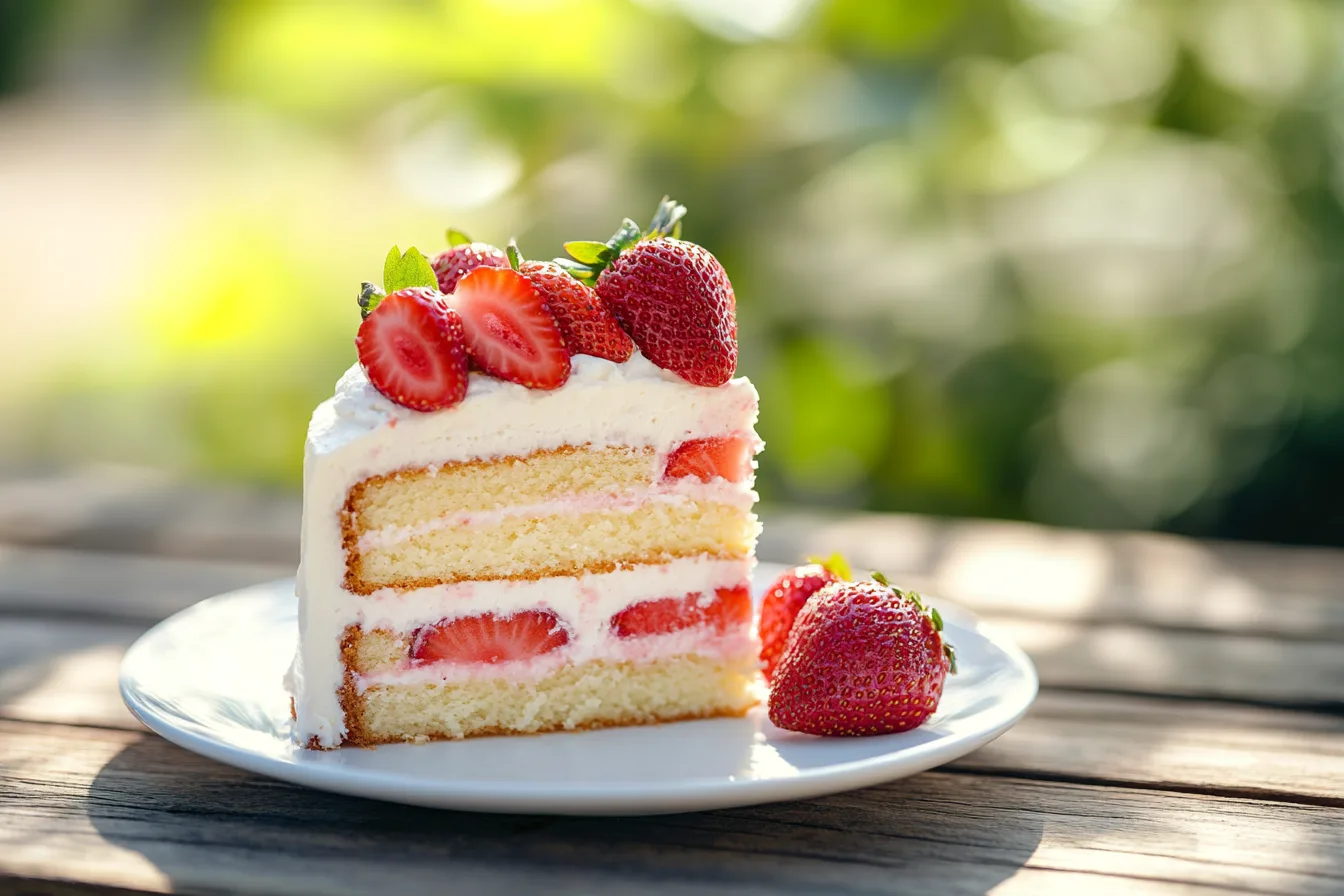
Just look at this beauty: A tall Strawberry Cheesecake Cake crowned with berries. Those layers of moist cake and creamy cheesecake are literally layers of love in every bite. It’s the kind of dessert that makes eyes light up when you bring it to the table. In this post, I’ll share exactly how to create this masterpiece in your own kitchen – from the simple ingredients (all easy to find) to step-by-step instructions and pro tips. Get ready to wow your friends and family with a homemade dessert that tastes like it came from a fancy bakery. Let’s dive in!
Why You’ll Love This Recipe
Why choose this Strawberry Cheesecake Cake over a plain cake or ordinary cheesecake? Let me count the ways:
- Two-in-One Showstopper: You’re essentially making two desserts in one, yet it’s easier than it looks. It has the “wow” factor of a bakery creation – a true showstopping cake that’s perfect for celebrations. It’s the best of both worlds, pleasing cheesecake lovers and cake lovers alike in one go.
- Surprisingly Easy Prep: Don’t be intimidated by the layers. This recipe is broken down into simple steps. You can even use some shortcuts (like store-bought components) to make prep super quick. With some planning, it can feel like a 5-minute cake prep before you let the fridge and oven do the work. It’s an easy make-ahead dessert too (more on that later).
- Kid-Friendly & Fun: The bright strawberry flavor and creamy texture make this a kid-friendly cake that little ones adore. The pink hues from real strawberries make it visually fun – my kids call it a “giant strawberry ice cream sandwich.” You’ll love seeing the smiles over those layers!
- Make-Ahead and Party-Perfect: This cake is a crowd-pleaser for sure. It holds up well, so you can make it the day before a party. In fact, it tastes even better after chilling, as the flavors meld together. Whether it’s a birthday, holiday, or just a weekend treat, this cake steals the show as the perfect party dessert.
- Customizable & Adaptable: Need a healthy dessert option or something for dietary needs? This recipe can handle it. It’s easy to tweak into a gluten-free alternative or a lighter version without sacrificing too much taste (see Healthy Variations below). Dairy allergy in the family? We’ve got dairy-free substitutes lined up. Basically, you’ll love that this recipe is flexible and forgiving.
With all these benefits, there’s no reason not to love this recipe. It’s one of those desserts that checks all the boxes – easy, gorgeous, delicious, and adaptable. Once you try it, don’t be surprised if it becomes your most requested cake recipe!
Ingredients You’ll Need
Before we get started, let’s round up all the ingredients for our Strawberry Cheesecake Cake. We’ll be using U.S. imperial measurements for everything. This recipe has a few components (cake layers, a cheesecake layer, frosting, and optional toppings), but each uses common ingredients you might already have. Here’s your shopping list:
For the Strawberry Cake Layers (two 9-inch round cake layers):
- 2 ½ cups all-purpose flour – the base for our cake. (You can substitute cake flour for an even lighter crumb, using 2 ½ cups as well.)
- 1 ¾ cups granulated sugar – for sweetness.
- 1 tablespoon baking powder – helps the cake rise and become fluffy.
- 1 teaspoon salt – to balance the sweetness and enhance flavor.
- ¾ cup unsalted butter, softened (that’s 1½ sticks) – gives richness and a tender texture. Let it come to room temperature for easy mixing.
- 4 large eggs, at room temperature – acts as a binder and adds moisture. (For a whiter cake with a pink hue, you can use 6 egg whites instead of whole eggs, but 4 whole eggs adds richness.)
- ¾ cup whole milk – brings moisture and a fine crumb. Room temperature is best.
- ½ cup strawberry puree – this is made from real strawberries to flavor the cake. You can use fresh or frozen strawberries (thawed) and blend them into a purée. This roughly equals ~8 ounces of strawberries before pureeing. (If strawberries aren’t in season, frozen works great – in fact, many recipes use frozen berries for consistent flavorrecipegirl.com.)
- 2 teaspoons vanilla extract – enhances the sweetness and adds depth.
- A few drops of red or pink food coloring (optional) – if you want a more vivid pink cake color. The strawberry purée gives a light natural pink, but food coloring can make it pop.
For the Cheesecake Layer (9-inch round):
- 16 ounces cream cheese, softened (2 standard 8-oz packages) – the star of the cheesecake. Use full-fat for best results (more on this in the tips!).
- ⅔ cup granulated sugar – to sweeten the cheesecake.
- 2 large eggs, at room temperature – these will set the cheesecake when baked, giving it structure.
- ¼ cup sour cream – adds tangy flavor and creamy texture. Full-fat sour cream is recommended here.
- ¼ cup heavy whipping cream – for extra richness and to keep the cheesecake silky.
- 1 teaspoon vanilla extract – for flavor.
- Pinch of salt – just a little to balance sweetness.
- ¼ cup strawberry puree (optional) – for a strawberry-flavored cheesecake. If you want the cheesecake layer itself to be strawberry-infused and pink, mix in a bit of strawberry puree. (Alternately, you can fold in ½ cup of finely diced fresh strawberries into the batter, or swirl 2 tablespoons of strawberry jam on top before baking for a pretty effect.)
For the Cream Cheese Frosting:
- 12 ounces cream cheese, softened (1½ packages) – yes, more cream cheese! This makes a tangy, creamy frosting that complements the cake.
- ½ cup unsalted butter, softened (1 stick) – adds structure and richness to the frosting.
- 2 teaspoons vanilla extract – for flavor (you can sub half with almond extract for a hint of almond flavor, if you like).
- 3 tablespoons strawberry jam or puree (optional) – to flavor the frosting. This is optional; if you prefer a plain cream cheese frosting, you can omit. But a spoonful of strawberry jam can turn the frosting a lovely light pink and infuse more berry flavor.
- 3–4 cups powdered sugar – the sweetener and thickener for the frosting. Start with 3 cups and add more to reach your desired consistency.
- 1–2 tablespoons heavy cream – to adjust the frosting consistency, if needed (makes it smoother and creamier if the powdered sugar makes it too stiff).
For the Strawberry Compote (optional filling):
- 2 cups fresh strawberries, chopped (or frozen, thawed) – to make a simple compote layer.
- ¼ cup granulated sugar – to sweeten the compote as it cooks down.
- 1 tablespoon lemon juice – brightens the flavor and helps preserve color.
- 1 teaspoon cornstarch (optional) – if you want a thicker, jam-like compote, you can mix this with a little water and add to the cooking berries to thicken the mixture.
Optional Toppings/Variations:
- Fresh strawberries (and other berries) – for decorating the top. Halved strawberries, whole raspberries, blueberries, or even a mix for color.
- Crumbled cookies or strawberry crumble – ever had those strawberry shortcake ice cream bars with the crumble? You can mimic that by crushing freeze-dried strawberries with vanilla wafer cookies or graham crackers and pressing it onto the sides of the frosted cake for a delightful crunch.
- Whipped cream – dollop on top of slices when serving for extra indulgence.
- Mint leaves – purely for a pop of green color on top, which looks beautiful against the red berries.
Ingredient Swaps and Substitutions:
Have different dietary needs or preferences? No problem – here are some ingredient swaps to customize the cake:
- Gluten-Free Alternative: Easily make the cake gluten-free by using a 1:1 gluten-free baking flour in place of all-purpose flour for the cake layers. (Ensure your blend contains xanthan gum for structure.) The cheesecake layer typically doesn’t contain flour, so it’s already gluten-free. Also use gluten-free cookies if you decide to do a cookie crumble topping. This way, you’ll have a gluten-free version that everyone can enjoy.
- Dairy-Free Substitute: Yes, you can make this dessert dairy-free! Use dairy-free cream cheese (several brands make plant-based cream cheese) in both the cheesecake and frosting. Substitute the butter with a vegan butter or baking stick, and use full-fat coconut milk or coconut cream in place of heavy cream/sour cream. The cake part can be made with plant-based milk (like almond or oat milk) instead of whole milk. With these swaps, you can create a dairy-free dessert that still has those creamy, dreamy layers.
- Healthier & Lower-Fat Version: If you’re looking to lighten this up (at least a little), you can use Neufchâtel cheese (which has 1/3 less fat than cream cheese) in place of regular cream cheese. Greek yogurt (full-fat or 2%) can replace the sour cream in the cheesecake, and you can even sub half the cream cheese in the frosting with Greek yogurt cream cheese. Consider using a natural sweetener substitute for some of the sugar (like a stevia baking blend or monk fruit sweetener) to reduce sugars. Keep in mind, using too many low-fat products might affect the texture (cheesecake relies on fat to set properly – if you go entirely fat-free, it may not firm up well). But moderate swaps can give you a healthy version that still satisfies.
- Flavor Twists: While strawberry is the star, you can swap out the fruit if desired – for example, make a blueberry cheesecake cake or raspberry version by using those fruits in equivalent amounts. You can also add a bit of lemon zest to the cake batter for a lemony zing, or even a teaspoon of strawberry or raspberry extract if you want to boost that berry flavor artificially.
With ingredients in hand, we’re ready to get started. A quick note: always try to use room-temperature dairy (cream cheese, butter, eggs, etc.) for smoother mixing. Now, let’s talk about how much time you’ll need and some tips to streamline the process.

Prep & Total Time
One of the first questions you might have is: how long will this take to make? The answer: not as long as you think, especially since you can break it up into stages. Here’s the time breakdown for the Strawberry Cheesecake Cake:
- Prep Time (Active): ~30 minutes
This includes mixing the cake batter, the cheesecake filling, and prepping pans. If you make a quick compote, add another 5 minutes of chopping and stirring. You can save time by preparing the cheesecake batter while the oven preheats, and by using pre-pureed strawberries (or even strawberry jam) instead of cooking down your own puree. - Bake Time: ~25 minutes for the cake layers + 45 minutes for the cheesecake
The two cake layers can bake together in about 20-25 minutes. The cheesecake (if you choose to bake it rather than do a no-bake) takes around 45 minutes in the oven. The good news is you can bake the cheesecake first (or even the day before), and later bake the cake layers while the cheesecake cools. - Chill Time: at least 4 hours (for the cheesecake)
The cheesecake layer needs ample chilling – ideally, a few hours in the freezer so it becomes firm enough to handle when assembling the cake. You can do this overnight, which splits up the work nicely. The assembled cake also benefits from 1-2 hours of chilling after frosting, so it sets up nicely and slices cleanly. - Assembly + Decorating Time: ~20 minutes
Stacking the layers and frosting the cake doesn’t take too long, especially if you’ve done a good job cooling everything. Even if you’re a cake-decorating novice, give yourself maybe 20 minutes to assemble and add any decorations or piping. - Total Time: Approximately 6-8 hours (including inactive chilling time)
Don’t panic – most of this is not hands-on. Active working time is much shorter (maybe around 1 to 1.5 hours scattered in stages). If you plan ahead, you can make this over two days: bake the cheesecake and maybe the cake on Day 1, then assemble and frost on Day 2.
How does this compare to other multi-layer cakes? Pretty favorably! A classic layer cake with frosting might take 2-3 hours including cooling. A classic cheesecake might also take several hours with baking and cooling. Here, we’re combining both. But since we can overlap tasks (for example, make the frosting while things cool), it doesn’t feel too burdensome. Plus, it’s a make-ahead dessert by nature – it needs that chilling time, which means you get to do other things (or just relax) while dessert basically takes care of itself.
Time-Saving Tips: If you’re in a rush, consider these shortcuts:
- Use a ready-made cheesecake: Yes, you can actually buy a good-quality plain cheesecake from the store, freeze it, and use that as your middle layer! This can turn this recipe into almost a 5-minute dessert assembly: just bake two quick cake layers (you could even use a boxed strawberry cake mix for speed), then sandwich the store-bought cheesecake in between. It’s a hack for the time-crunched baker.
- No-bake cheesecake layer: Alternatively, make a 5-minute cheesecake filling with cream cheese, whipped cream, and gelatin, and let it set in a cake pan – this skips the long bake. (We won’t cover the full method here, but it’s an option if you know how to do a no-bake cheesecake.)
- Prep components in advance: The strawberry puree or compote can be made days ahead (or use strawberry jam). The cake layers can be baked, cooled, and wrapped tightly to freeze up to a week ahead. The cream cheese frosting can sit in the fridge for a day or two. Having these parts ready means on the day of serving, you just assemble and serve, making it a quick party dessert.
In summary, while this recipe does take some waiting time, the actual work is broken into easy chunks. The reward – that first bite of creamy, cakey, strawberry bliss – is WELL worth it. Now let’s make sure you have the right tools on hand to make the process even smoother.
Recommended Kitchen Tools
You don’t need any super-fancy gadgets to make this cake, but having some basic cake-baking tools will make things easier. Here are the kitchen essentials I recommend for this recipe:
- 9-inch Springform Pan: This is a must for the cheesecake layer. A springform pan (the kind with removable sides) allows you to bake the cheesecake and then easily release it. If you don’t have one, you could bake the cheesecake in a regular 9-inch round pan lined with parchment, but you’ll have to be extra careful lifting it out. The springform is the best tool for cheesecake prep.
- Two 9-inch Cake Pans: You’ll need two standard round cake pans for the strawberry cake layers. If you only have one, you can bake one layer at a time (just keep the remaining batter at room temp). It’s helpful if these pans are at least 2 inches deep. Prepare them properly (grease and line with parchment) to avoid sticking.
- Electric Mixer (Hand or Stand): Mixing the batter and frosting is much easier with an electric mixer. A stand mixer fitted with a paddle attachment is ideal for the cake and frosting, while a hand mixer works too. You’ll beat cream cheese and butter to fluffy perfection, which is hard to do by hand. Pro Tip: If using a stand mixer for frosting, use the paddle attachment and mix on low at the end to get out air bubbles for a silky finish.
- Mixing Bowls and Rubber Spatula: Have a few bowls on hand for mixing wet and dry ingredients separately. A flexible spatula helps scrape down the sides of bowls to ensure everything is well combined (and nothing is wasted).
- Blender or Food Processor: This is for making the strawberry puree if you’re starting from whole berries. A mini food processor or even an immersion blender works well to liquefy the berries. You can also mash them by hand if needed (the cake is forgiving if there are tiny chunks of berry).
- Saucepan: If you plan to cook a strawberry compote (or if you need to reduce strawberry puree to concentrate the flavor), a small saucepan will be handy.
- Parchment Paper: Use this to line the bottom of your cake pans and potentially the springform pan for the cheesecake. It ensures the cake layers don’t stick and come out cleanly.
- Wire Rack: For cooling the cakes. Proper cooling prevents soggy bottoms and stops the cooking process at the right time.
- Long Serrated Knife or Cake Leveler (optional): If your cake layers dome a bit, a serrated knife helps trim them flat for neat layering. Also useful for cutting the cake when serving to get clean slices.
- Cake Turntable (optional): If you decorate cakes often, a turntable is great for frosting smoothly. Not required, but it makes the job easier – you can spin the cake as you smooth the sides.
- Offset Spatula and Bench Scraper: An offset spatula (angled spatula) is extremely helpful for spreading frosting evenly on the cake and adding that swoopy texture on top. A bench scraper (or icing smoother) is fantastic for getting the sides of the cake really smooth if you’re going for a polished look. These are the best tools for cake baking when it comes to decorating.
- Piping Bag and Tip (optional): If you want to pipe a border or any decoration (like rosettes or swirls of frosting on top), have a piping bag and your favorite tip (I love a large star tip for pretty swirls). This is optional, but it can elevate the presentation.
- Toothpicks & Skewers: Use a toothpick to test cake doneness (it should come out clean). A skewer can be handy if assembling layers to keep them from sliding (you can stick a skewer down the center of the cake while chilling, just remember to remove it before serving!).
- Oven Thermometer (optional): Baking at the correct temperature is key. If you’re not sure your oven is true-to-temp, an oven thermometer can save your cake. Baking at the wrong temperature is a common mistake that can cause dry cake or undercooked centers, so it’s a nice kitchen tool to have for all baking.
That’s pretty much it. Before you get overwhelmed by the list, note that most of these are standard kitchen items. Even if you’re a minimalist baker, as long as you have cake pans, a mixer, and a spatula, you can make this recipe work. Now that we have everything ready, let’s walk through the process step by step.
Step-by-Step Instructions
Ready to build this scrumptious layer cake? I promise, step by step, it’s totally doable. I’ll guide you through each part of the process with clear instructions. Take it one layer at a time, and before you know it you’ll have an impressive Strawberry Cheesecake Cake to brag about!
1. Bake the Cheesecake Layer
We’ll start with the cheesecake since it needs to cool and chill.
- Prep: Preheat your oven to 325°F (163°C). Take your 9-inch springform pan and lightly grease it. For extra security, line the bottom with a circle of parchment paper and then grease the paper as well. This will ensure easy release. Pro Tip: Wrap the outside of the springform pan with two layers of aluminum foil to prevent leaks, especially if using a water bath.
- Make Cheesecake Batter: In a large bowl, beat the softened cream cheese until completely smooth (about 2 minutes on medium speed). Add the 2/3 cup sugar and a pinch of salt, and beat another minute – the mixture should be creamy with no lumps. Now beat in the eggs one at a time, mixing just until combined after each (don’t overmix here). Add the 1/4 cup sour cream, 1/4 cup heavy cream, and 1 tsp vanilla. Beat until the batter is smooth and creamy. If you’re making the cheesecake strawberry-flavored, blend in the 1/4 cup strawberry puree now. Pro Tip: Scrape down the sides of the bowl a few times during mixing to make sure everything incorporates evenly.
- Bake: Pour the cheesecake batter into the prepared springform pan. If you wrapped the pan in foil, you can place it in a large roasting pan and pour an inch of hot water around it (water bath method helps prevent cracks, but if that’s too much hassle, you can bake without a water bath – it might crack on top, but that’s okay since it will be hidden inside the cake!). Bake for about 45 minutes, or until the cheesecake is set at the edges and just slightly jiggly in the center. The top might puff up a bit or even get a small crack – that’s fine.
- Cool & Chill: Turn off the oven and crack the door open, letting the cheesecake cool gradually in the oven for about 20-30 minutes (this gentle cooling further prevents major cracks). Then remove it and cool completely on a wire rack. Once it’s near room temp, cover the pan with foil and pop the cheesecake into the freezer. You want it frozen solid (or at least very firm) before assembly. This usually takes at least 4 hours or overnight. Pro Tip: Freezing the cheesecake makes it so much easier to handle and assemble – it will be like a giant “ice cream sandwich” layer.
While the cheesecake is baking/cooling, you can move on to the cake layers.
2. Bake the Strawberry Cake Layers
Now for the luscious strawberry cake that will hug our cheesecake layer.
- Prep: Preheat the oven to 350°F (177°C) if it’s not already on. Prepare two 9-inch round cake pans: grease the sides and bottoms, line the bottoms with parchment rounds, then grease the parchment as well. Dust a little flour in the pans and tap out the excess. This prep ensures the cakes will release easily.
- Strawberry Puree (if not already made): If using fresh or frozen whole strawberries, blend or process about 8-10 ounces of berries to get 1/2 cup of puree. If the puree seems very watery, you can optionally cook it in a saucepan for 5-10 minutes to reduce it to a thicker concentrate – this intensifies the flavor and removes excess moisture. Let it cool before adding to batter. (Shortcut: If in a rush, use 1/2 cup good-quality strawberry jam instead of puree, and reduce the sugar in the cake by 2 tablespoons.)
- Mix Dry Ingredients: In a large mixing bowl, whisk together the flour, baking powder, and salt (the 2½ cups flour, 1 Tbsp baking powder, 1 tsp salt). If you’re using a stand mixer, you can do this directly in the mixer bowl. Then add the sugar and whisk that in as well. So all dry ingredients are combined.
- Add Butter: Add the softened 3/4 cup butter to the dry mixture. Use a hand mixer or stand mixer on low speed to mix the butter into the flour until it forms a crumbly texture (often called a “sandy” or pea-sized crumb stage). This method (reverse creaming) coats the flour with fat and can help create a tender cake. Mix for about 1-2 minutes until it looks kind of like coarse meal.
- Add Wet Ingredients: In a separate bowl or large measuring cup, whisk together the milk, eggs, and vanilla (the 3/4 cup milk, 4 eggs, 2 tsp vanilla). If your strawberry puree is cool, stir that in as well. With the mixer on low, pour in about half of the wet ingredients into the butter-flour mixture. Increase speed to medium and beat until light and fluffy (about 1 minute). This step builds structure. Then add the remaining wet ingredients and the rest of the strawberry puree if you haven’t added it yet. Beat on medium speed for another 30 seconds until well combined. The batter should be fairly smooth and a lovely pale pink color (depending on your berries). If you want a brighter pink, add a couple drops of food coloring now and mix just until blended. Pro Tip: Do not overmix once the flour is added – overmixing can develop too much gluten and make the cake toughthebakersalmanac.com. Mix just until everything is incorporated and smooth.
- Bake: Divide the batter evenly between the two prepared pans. (Tip: You can weigh the pans to ensure even layers, or just eyeball it.) Smooth the tops with a spatula. Bake at 350°F for about 20-25 minutes. They’re done when the cakes are lightly golden and a toothpick inserted in the center comes out clean. The edges might start to pull away from the pan a bit. Avoid over-baking which can dry them out.
- Cool: Let the cakes cool in the pans for about 10 minutes, then run a knife around the edges and invert each cake onto a wire rack. Peel off the parchment paper. Let them cool completely to room temp. Pro Tip: To speed up cooling, you can put the cake layers (still on the rack) into the fridge or freezer for a short time. In fact, slightly cold cake layers are easier to handle and frost.
At this point, you should have two cooled strawberry cake layers and a frozen cheesecake ready (or freezing). If you made a strawberry compote, ensure that’s chilled too. Now it’s time to make the frosting and put it all together!
3. Make the Cream Cheese Frosting
A good cream cheese frosting ties this cake together – it’s tangy, not too sweet, and pairs perfectly with strawberries.
- Beat Cream Cheese and Butter: In a large bowl, beat the softened cream cheese and softened butter together until completely smooth and fluffy. This takes about 2-3 minutes on medium-high speed. Scrape down the sides of the bowl to make sure there are no lumps lurking – you want a homogeneous, creamy mix.
- Add Flavorings: Add the vanilla extract (2 tsp) and a pinch of salt (if you like – salt can heighten the sweetness and flavor). If you plan to make the frosting strawberry-flavored, also add 2-3 tablespoons of strawberry jam or puree. Beat these in until combined. The mixture might look a bit loose or curdled at this point if you added jam, but don’t worry – it will come together once we add sugar.
- Add Powdered Sugar: Gradually add the powdered sugar, about 1 cup at a time, mixing on low speed after each addition. (Low speed prevents a powdered sugar snowfall in your kitchen!) After about 3 cups, check the consistency. For a layer cake, you want the frosting to be spreadable and able to hold its shape, but not so stiff that it’s hard to spread. If it’s too thin, add another 1/2 cup of sugar. If it’s getting too thick, add a teaspoon or two of heavy cream to loosen it. In the end, you should have a smooth, creamy frosting that forms soft peaks.
- Beat Out Air Bubbles: Increase the mixer to medium-high and beat for a final 20 seconds or so, then finish by hand-stirring with a spatula to knock out any air bubbles. You now have a luscious cream cheese frosting. Pro Tip: If your kitchen is warm or you’re not assembling the cake immediately, keep this frosting in the fridge. You may need to re-whip it briefly before frosting the cake.
- (Optional) Prepare Piping Bag: If you want to pipe decorations, set aside a cup of frosting and fit a piping bag with your chosen tip. You can color this portion differently (for instance, a little pink tint) if you want contrast for decoration.
Now everything is ready: cake layers, cheesecake, frosting, and any fillings/toppings. On to the grand finale – assembling those layers of love!
4. Assemble the Layers
This is where the magic happens: we’ll stack the cake with the cheesecake in the middle.
- Level the Cakes (if needed): Check your cake layers – if they have a domed top, use a long serrated knife to trim the tops and make them flat. Flat layers stack more stably and make for an even, professional-looking cake. (Snack on those cake trimmings or crumble them on top of the cake as extra decoration!) The cheesecake, having been baked flat, should be pretty level; if it’s a little uneven or wider than the cake, you can trim the sides gently with a knife to fit.
- Bottom Cake Layer: Place one strawberry cake layer on your serving plate or a cardboard cake round. If you have a cake turntable, assemble on that for ease. Spread a thin layer of frosting on top of this bottom cake layer. This acts like “glue” for the cheesecake and also adds a bit of moisture to the junction.
- (Optional) Add Compote: If you made the strawberry compote (or if you have strawberry jam), spread about 1/3 to 1/2 cup of it on top of the bottom cake layer (on top of that thin smear of frosting). Don’t go all the way to the edge – keep a half-inch margin to prevent it from oozing out. This adds an extra punch of real strawberry between the layers.
- Add Cheesecake Layer: Now, take your frozen cheesecake out of the freezer. Run a knife around the edge and release it from the springform pan. Carefully lift or slide the cheesecake off the pan bottom (use a long thin spatula or knife to help). Place the cold, firm cheesecake layer on top of the bottom cake layer (or on the compote, if using). Try to center it. If the cheesecake is slightly larger in diameter than the cake, you can gently shave off a bit around the edges to make it line up.
- Top with Second Cake Layer: Spread another thin layer of frosting (or compote) on top of the cheesecake. Then place the second strawberry cake layer on top. Press down lightly to make sure it’s all snug. At this point, you have three layers stacked: cake, cheesecake, cake. It’s okay if it looks a bit messy or if some compote is peeking – we’ll cover everything with frosting.
- Check Alignment: Step back and check if the layers are straight. Adjust gently if anything is off-center. If your cheesecake layer was very frozen, the whole cake will be quite cold and firm (which is good for frosting). If it’s sliding at all, insert a skewer down the center to hold things, and then refrigerate for 15 minutes before frosting.
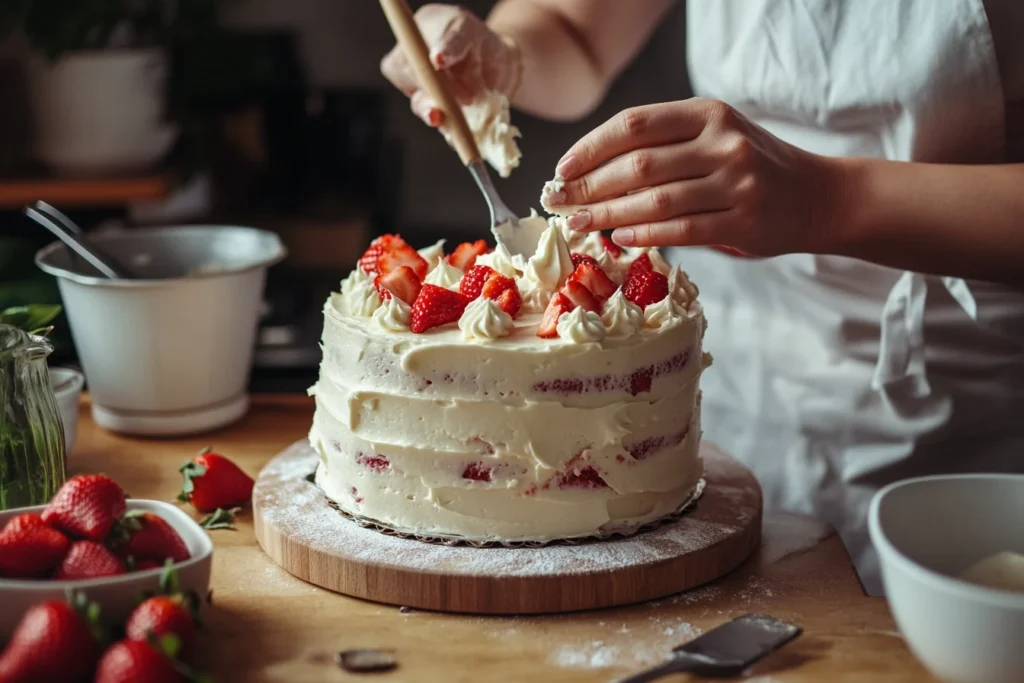
5. Frost the Cake (Crumb Coat & Final Coat)
Time to wrap this cake in its creamy cream cheese frosting robe!
- Apply a Crumb Coat: Using an offset spatula, apply a thin layer of frosting all over the cake – top and sides. This is the “crumb coat,” which traps any loose cake crumbs and primes the surface for the final layer of frosting. Don’t worry if it looks thin or if you can see the cake through it. The goal is just to catch crumbs. Smooth it as best as you can. Pro Tip: Wipe your spatula off frequently and use fresh frosting as needed so you’re not dragging crumbs around. Once crumb coated, pop the cake into the refrigerator for about 20-30 minutes to let that layer firm up. This makes the final frosting so much easier and crumb-free.
- Final Frosting Layer: Now pile a generous amount of frosting on top of the cake and spread it out and down over the sides, turning the cake stand as you go (if using one). Frost the sides with more frosting, smoothing it with your spatula or a bench scraper. This cream cheese frosting is fairly forgiving – you can do a rustic look by making swooshes with the spatula, or smooth it out completely for a sleek look. If you notice the frosting getting too soft (if your kitchen is warm), chill the cake a bit and continue. Aim for an even coat about 1/4 to 1/2 inch thick.
- Decorate: With the remaining frosting (or the frosting set aside in a piping bag), add any decorations. For example, pipe swirls or rosettes around the top border of the cake. You can also do a border at the bottom to hide where the cake meets the plate. Feel free to get creative – there’s no wrong way to decorate!
- Add Toppings: Gently place fresh strawberry halves on top of the cake. You can arrange them in a circle or pile them in the center. If using mixed berries, arrange them in a pleasing way on top (and even stick a few on the sides of the piping if you piped rosettes). Sprinkle your cookie/strawberry crumble around the top edge or press it lightly onto the sides of the cake for that shortcake crunch effect. A few mint leaves tucked in among berries give a nice color contrast. It’s looking gorgeous now!
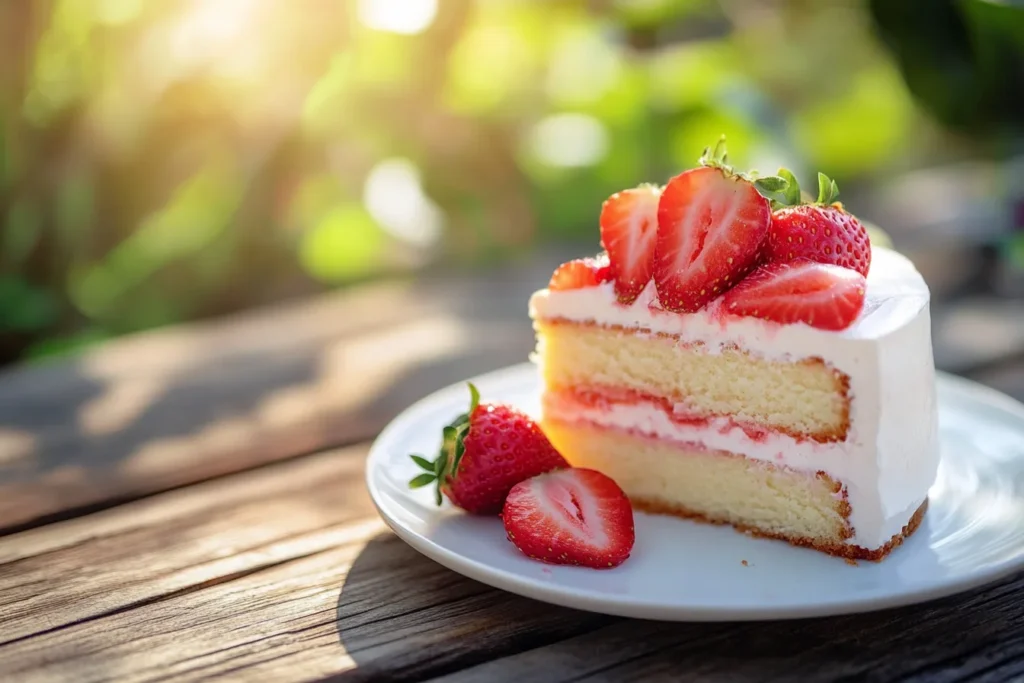
Here’s a peek at a sliced Strawberry Cheesecake Cake: You can see the distinct layers – moist vanilla-strawberry cake, a thick pink strawberry cheesecake center, and all that wrapped in cream cheese frosting. The layers hold together nicely, and every forkful gives you a bit of each. The creamy cheesecake keeps the cake layers moist, and the cake layers give the cheesecake structure and a lightness. It’s truly a dessert lover’s dream come true, marrying two textures and flavors.
- Chill (One More Time): For best results, place the assembled and frosted cake back in the fridge for at least 1 hour before slicing. This helps everything set. (If you’re serving later, you can keep it chilled for up to 24 hours – just cover it loosely with plastic wrap once the frosting is slightly firm to protect it.)
6. Serve and Enjoy!
When you’re ready to serve, take the cake out of the fridge about 20 minutes prior, so it’s not ice-cold (the flavors come through better when slightly closer to room temp). Use a sharp knife wiped clean between cuts for the prettiest slices. Serve as is or with a dollop of whipped cream on the side. Get ready for the ooh’s and aah’s as you reveal that stunning layered interior!
Pro Tip (for slicing): Warm your knife blade by running it under hot water, then dry it off. A warm knife will glide through the cold cheesecake layer more smoothly, giving cleaner slices.
Now pat yourself on the back – you just made a homemade Strawberry Cheesecake Cake that is sure to impress everyone who tastes it. Enjoy the compliments and, of course, the cake itself!
Nutrition Info (Per Serving)
Let’s talk about what you’re getting in each indulgent slice of this cake. Keep in mind these numbers are estimates and can vary based on exact ingredients and portion sizes. This calculation is for a 1/12th slice of the cake (assuming the whole cake serves 12 people, which makes for generous pieces given the cake’s height and richness).
- Calories: ~750 kcal per serving
- Protein: ~9 g
- Fat: ~45 g (of which saturated fat ~25 g)
- Carbohydrates: ~80 g
- Sugar: ~60 g
- Fiber: ~2 g (thank you, strawberries and any almond flour if used)
- Sodium: ~350 mg
Yes, it’s a decadent dessert – no surprises there! The combination of cheesecake and cake means we have cream cheese, butter, and sugar in play. The fat content is high (that’s what makes it taste so creamy), and the sugars mainly come from the cake base and frosting.
Now, if you’re curious about how a lighter version might compare: Suppose we make some healthy swaps – e.g., use low-fat cream cheese, Greek yogurt instead of sour cream, a sugar substitute for half the sugar, and gluten-free flour with perhaps a touch less sugar in the cake. The calories might drop to around ~550 per slice, fat to ~30 g, and sugar to ~30-40 g. The protein could bump up slightly if using Greek yogurt (maybe to ~10 g). So you can lighten it a bit. However, remember what we discussed in Mistakes to Avoid – going too low-fat can affect texture. The full-fat version holds together firmly (and taste-wise, let’s face it, it’s incredible).
Nutritionally, one slice is truly an indulgence. But it’s also quite filling – you likely won’t be going back for a second huge slice (well, unless you’re my cousin, who did because he loved it that much!). On the bright side, there are some nutrients: you get a good dose of calcium from the dairy, a hit of vitamin C from the strawberries, and a bit of protein from the cream cheese and eggs. Sometimes, it’s absolutely fine to enjoy a treat like this and not worry about the numbers. Everything in moderation, including moderation, right?
If you do want a smaller portion, you could cut the cake into 14 or 16 thinner slices, especially for a party where there are other desserts. That would reduce the per-slice counts accordingly.
In any case, this dessert is meant to be a special treat. Savor it, share it, and most importantly, enjoy every bite guilt-free – you’ve earned it after all that baking!
Healthy Variations
Looking to enjoy this strawberry cheesecake cake with a little less guilt or to accommodate some dietary preferences? Here are a few healthy variations and tweaks you can try. These will make the cake a bit lighter or suitable for different diets, while keeping it delicious:
- Lower-Fat “Lightened-Up” Cake: As mentioned, you can substitute Neufchâtel cheese (1/3 less fat cream cheese) for the full-fat cream cheese in both the cheesecake and frosting. Greek yogurt can replace the sour cream in the cheesecake and even some of the cream cheese in the frosting (some recipes successfully use half cream cheese, half Greek yogurt for frosting). Using 2% milk instead of whole in the cake will cut a little fat too. The result will have a tad fewer calories and fat. Do keep in mind the advice from cheesecake experts: using all low-fat cream cheese could make the cheesecake layer softer or too soft (since the fat is what helps it set)allrecipes.com. But using a lighter cream cheese combined with Greek yogurt can still yield a creamy result with a bit fewer calories.
- Reduce the Sugar: To make a low-sugar or refined sugar-free version, consider replacing part of the sugar with natural alternatives. For instance, you could use a granulated stevia blend or erythritol for half of the sugar in the cake and cheesecake. Use powdered erythritol (or a keto confectioners’ blend) for the frosting in place of powdered sugar. The sweetness will still be there with far less actual sugar. Also, relying on ripe strawberries for natural sweetness can help – a really ripe strawberry puree may let you dial back the added sugar a touch. (Note: Using sugar substitutes can sometimes affect texture, making cakes a bit drier. So experiment carefully – maybe try replacing 25-50% of the sugar, not 100%.)
- Incorporate Whole Grains: For a clean eating dessert vibe, you could swap 1 cup of the all-purpose flour in the cake for 1 cup of white whole wheat flour or whole wheat pastry flour. This will add some fiber and nutrients. The cake might be a bit denser, but the moisture from the strawberries can help keep it tender. Another idea is to use almond flour for a portion of the flour (say 1/2 cup), which adds healthy fats and reduces carbs – however, you’ll need to add a binding agent (like an extra egg) if you go heavy on almond flour since it’s gluten-free.
- Gluten-Free Version: Already discussed above, but to reiterate – use a good gluten-free all-purpose flour blend for the cake layers (and ensure any added ingredients like baking powder are gluten-free, most are). The rest of the recipe is naturally gluten-free except maybe the crumble topping if you use cookies (you can find gluten-free cookies or just omit the crumble). The gluten-free cake might be a touch more delicate (sometimes they crumb more easily), but the taste can be nearly identical. This way you have a wonderful gluten-free cake version of this recipe.
- Dairy-Free & Vegan Adaptation: To go full dairy-free, use plant-based cream cheese and butter as noted. Also use coconut cream or a vegan whipped topping instead of heavy cream. For the cake, swap eggs with flax eggs (1 tbsp ground flax + 3 tbsp water per egg, let it gel) or a commercial egg replacer. Make sure to use a dairy-free milk. It’s actually possible to make a decent vegan cheesecake with soaked cashews or dairy-free cream cheese + coconut cream base. If you’re experienced with vegan baking, you can certainly adapt this recipe. The result will be a dairy-free dessert that’s also egg-free if done fully vegan. (It will have a different character, but still yummy.)
- Protein Boost: Want to justify cake as a post-workout snack? 😄 Try adding a scoop of unflavored or vanilla protein powder to the cake batter (reduce flour by the same amount). Greek yogurt in the cheesecake also adds protein. This could easily add 3-5 extra grams of protein per slice without changing flavor much.
- Smaller Portion, Same Satisfaction: Another approach to make it “healthier” is portion control. Consider making this into mini cheesecake cupcakes: Bake the cheesecake batter in cupcake liners (like mini cheesecakes) and the cake batter as cupcakes. Then assemble individual cupcake-sized cheesecake cakes – each person gets their own mini cake. This way, each serving is smaller by design, and you’re less likely to overindulge. Plus, minis are super cute for parties and portioned perfectly.
Remember, even with healthy tweaks, this is meant to be a treat. Sometimes I make the recipe as-is (full sugar, full fat) for special occasions, and other times I play around with healthier swaps for a casual family dessert. It’s totally up to you and what you’re in the mood for. The wonderful thing is that this recipe is flexible enough to handle changes – so you can have your cake and eat it too (without too much guilt)!

Serving Ideas
You’ve put in the effort to make this stunning cake – now have fun serving it! Here are some creative serving ideas and pairings to make each slice of Strawberry Cheesecake Cake even more enjoyable:
- Classic with Whipped Cream: A small dollop of whipped cream (or whipped coconut cream if you prefer) on the plate next to each slice gives a lovely light contrast to the dense cake. You can even flavor the whipped cream with a touch of vanilla or a splash of almond extract. A slice of this cake with a cloud of whipped cream and a couple of fresh strawberry slices is simplicity at its best.
- Extra Berries and Sauce: Elevate the berry factor by serving each slice with a spoonful of fresh berry compote or a drizzle of strawberry sauce. If you have leftover strawberry compote from the recipe, warm it slightly and pour over the slice – it’s a berry bliss explosion! A few extra macerated berries (strawberries soaked with a bit of sugar and lemon) on the side also add juiciness. This turns the cake into an almost strawberry shortcake vibe.
- Ice Cream on the Side: For the ultimate indulgence, serve this cake with a small scoop of vanilla ice cream or strawberry ice cream. Yes, it’s doubling down on dessert, but for a celebration, why not? The cold ice cream with the creamy cheesecake and cake is dreamy. It’s like a deluxe sundae-cake fusion. Great for a summer barbecue party dessert – cake a la mode!
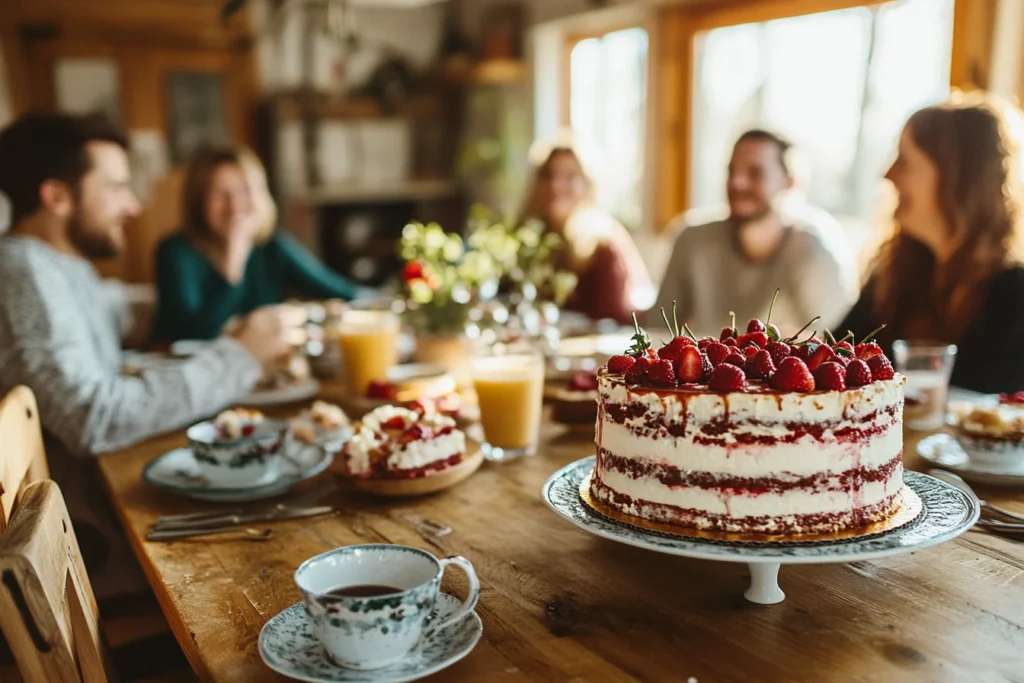
- Brunch Vibes: Believe it or not, this cake can fit into a brunch menu. Serve thin slices as part of a brunch buffet alongside things like quiches and fruit salad. It’s not much different from serving danishes or coffee cake, right? 😉 Pair it with mimosas or a hot cup of coffee. I once served this for a Mother’s Day brunch, and it was a hit – it was the highlight of the brunch spread (and definitely a conversation piece).
- Fancy Plating: If you want to get restaurant-fancy, plate the slice on a drizzle of chocolate sauce or balsamic reduction (strawberries and balsamic are an interesting combo!). You could also dust the plate with a little cocoa or powdered sugar for contrast. Add a sprig of mint on top of the slice. Sometimes I’ll grate a tiny bit of dark chocolate over the top of the cake for a pretty finish and a hint of chocolate flavor.
- Beverage Pairings: For a non-alcoholic option, a cold glass of milk is classic with cake. But consider serving with a strawberry milkshake for a over-the-top strawberry experience! For adults, this cake goes wonderfully with a glass of Champagne or prosecco (bubbles cut through the richness), or a dessert wine like Moscato. Even a rosé wine would be a nice pairing for a party. If coffee or tea is more your thing, a latte or a cup of earl grey complements the creamy sweetness nicely.
- Celebration Twists: Thinking of using this as a birthday cake or anniversary cake? Go for it! You can adapt it for birthdays by adding some white chocolate curls on top, writing a message in melted chocolate, or even incorporating a layer of birthday cake flavored crunch between layers (though honestly, it’s perfect as is). One fun idea: if making for a kid’s birthday, add a layer of sliced bananas along with the strawberries – it becomes a banana-split cake! Or add a sprinkle of colorful confetti sprinkles on top of the frosting to give it a festive look.
Serving is really all about presentation and little extras. The cake itself has star quality, so you don’t need to do much. Whether you serve it simply on its own or decked out with accompaniments, make sure to serve the slices with pride. After all, you created a showstopping cake that deserves a round of applause! Now, let’s ensure that hard work doesn’t go to waste by learning how to avoid common pitfalls and how to store leftovers (if there are any!).
Mistakes to Avoid
Even experienced bakers can run into hiccups with a layered dessert like this. But don’t worry – I’ve compiled a list of common mistakes and how to fix or avoid them. Keep these in mind, and you’ll be on your way to cake perfection. Here are some pitfalls and troubleshooting tips for our Strawberry Cheesecake Cake:
- Using Low-Fat Dairy (and Ending Up with a Runny Cheesecake): It might be tempting to use low-fat cream cheese or sour cream to save calories, but this can backfire. The cheesecake may not set firmly and could end up runny or too soft. The fat is needed for that signature creamy, dense texture. In fact, if you’ve ever had a cheesecake turn out runny, it was likely because of low-fat ingredients. Fix: Stick to full-fat cream cheese and dairy for the main recipe, or use tested substitutions (like Greek yogurt) in moderation. If you did use low-fat and the cheesecake is too loose, try freezing it before assembling (to firm it up), or in worst case, serve the dessert in a trifle dish instead of as a stacked cake (hey, it happens – call it a “cheesecake trifle” and it will still taste good!).
- Not Chilling Long Enough: Patience is key here. If you try to assemble the cake with a warm cheesecake or warm cake layers, you’re heading for a slidey, sloppy disaster. The cheesecake needs to be cold and firm. Fix: Plan ahead for chilling time. If you’re in a rush and the cheesecake isn’t fully set, pop it in the freezer until it’s solid. Same with cake layers – if they’re even a little warm, chill them. A well-chilled cake is so much easier to frost and assemble.
- Overmixing the Cake Batter: Overmixing can make your cake layers tough and dense because it develops excess gluten in the flour. It’s a common baking mistake – you want a tender crumb, not bread! Fix: Mix just until the ingredients are combined. Once you add the flour to the batter, avoid long mixing times. If using a mixer, keep it on low or medium-low and stop as soon as you don’t see dry streaks. You can even finish mixing by hand to be gentle. If you suspect you overmixed (batter was very stretchy/elasticky), don’t panic – the cake will still be edible, just a bit firmer. Generously brush the layers with a simple syrup (equal parts sugar and water, boiled and cooled) to moisten them after baking.
- Overbaking or Underbaking the Cake: Baking time can vary by oven. Overbake and you get dry cake; underbake and the center can be gooey or the cake may collapse. Fix: Check the cakes a couple minutes before the recommended time. Lightly press the top – it should spring back. Or use the toothpick test. If you see dark browning at edges or a tester comes out with dry crumbs, it’s done (or even a tad over). If underbaked (tester comes out wet), give it a few more minutes but watch closely. Also, make sure your oven temperature is accurate – an oven thermometer helps avoid this mistake.
- Cracked or Soggy Cheesecake: If you bake the cheesecake without a water bath, some cracking on top is normal but not a huge issue for this recipe (since it will be hidden under frosting). However, if a water bath is used incorrectly, leaks can cause a soggy cheesecake. Fix: To prevent cracks, don’t overbake and do the gradual cooling as described. If it cracks anyway – ignore it. If using a water bath, ensure that foil is truly watertight around the pan or use a silicone pan liner. If you discover a bit of water got in and the crust (if you used one) is soggy, you might need to rebake the cheesecake layer without water bath for 10 extra minutes to dry it out, or make a new one. But usually, with no crust, a small amount of moisture won’t ruin it – just freeze it and carry on.
- Skipping the Crumb Coat: It might seem like an extra fuss, but skipping the crumb coat when frosting can lead to frustration. You’ll see strawberry cake crumbs dragging through your white frosting, messing up the look. Fix: Always do a quick crumb coat – a thin layer of frosting – and chill it. This seals the cake. Then do your final layer of frosting. You’ll get a much cleaner finish. If you’re short on frosting, reserve a little extra specifically for the final coat to ensure you have enough “clean” frosting to cover.
- Uneven Layers and Lopsided Cake: If your cake layers or cheesecake are uneven, the whole cake can lean or look wonky. Fix: Level your cake layers with a serrated knife – it makes a big difference for stability. Also check that your cheesecake is roughly the same thickness all around (no raised lip from the pan, etc. – trim it if needed). When stacking, if you notice one side is taller, you can shim with a tiny bit more frosting or even flip a cake layer over. Another tip: place the bottom cake layer bottom-side down, and the top cake layer upside-down (so the flat bottom is on top). This gives a flat top surface. If after assembling it’s still uneven, don’t fret – a rustic frosting style can hide a lot, and once it’s sliced, no one cares if the cake leaned a little on the platter.
- Serving Too Cold (or Too Warm): Not exactly a baking mistake, but serving the cake rock-hard from the fridge means the cheesecake might taste overly dense and the flavors muted; too warm and the cheesecake can be melty. Fix: Aim to serve chilled but not frozen. Take the cake out 15-30 minutes before serving to let it soften slightly. Use a sharp knife cleaned between cuts for nice slices. If the cake was frozen solid (say you stored it long-term), thaw overnight in the fridge and then counter for a bit before serving.
By being mindful of these common issues, you’ll avoid most potential disasters. But hey, even if something goes wrong, remember that almost any mistake can be remedied or at least covered with frosting and a smile. And at the end of the day, it’s all about the taste – which with this cake, is going to be delicious no matter what. Now, let’s talk about how to store this masterpiece and make it ahead if needed.

Storage & Make-Ahead Tips
One of the best parts of this Strawberry Cheesecake Cake is that it stores well and can be made ahead of time. In fact, I highly recommend making parts of it in advance to ease your workload and improve the flavors. Here’s how to handle leftovers and prep ahead:
Make-Ahead Tips:
- Cheesecake Layer: This can be made 1-2 days ahead. Once baked and cooled, keep it in the springform pan, cover tightly with plastic wrap, and store in the fridge (for a day) or freezer (for longer). If freezing, you can actually keep it for up to a week or two, well-wrapped. Just ensure it’s protected from air to avoid freezer burn. Having the cheesecake done ahead is a huge time saver.
- Cake Layers: You can bake the strawberry cake layers ahead as well. Once they are completely cool, wrap each layer tightly in plastic wrap. They can stay at room temperature for a day (if your kitchen is cool), or in the fridge for a couple of days. For longer storage, wrap in plastic then foil and freeze them. Many bakers actually prefer frosting cakes with layers that have been chilled or frozen, as they produce fewer crumbs and are easier to handle. Just let frozen layers thaw in the fridge before assembling (they thaw quickly).
- Frosting: Cream cheese frosting can be made up to 2-3 days ahead. Store it in an airtight container in the refrigerator. When ready to use, let it soften at room temp for 30 minutes and give it a quick whip with a mixer or vigorous stir to get it smooth again. If it’s too stiff, a touch of milk or cream can loosen it.
- Whole Cake Assembly: You can assemble the entire cake (layers stacked and frosted) the night before you plan to serve. In fact, I find the cake tastes even better the next day – the strawberry flavors intensify and everything melds together. After assembling and decorating, store it in the fridge. A chilled cake also slices more neatly. Just hold off on adding any perishable fresh fruit garnish until closer to serving (you can place berries on a few hours ahead, but overnight might cause them to weep juices).
- Compote/Sauce: If you made the strawberry compote, it will keep in the fridge 5-7 days easily, or you can freeze it for a few months. So that’s another component you could have done well ahead.
Storage of Leftovers:
- Refrigerator: Because of the cheesecake and cream cheese frosting, this cake should be stored in the refrigerator when not being served. Cover the cut surfaces with plastic wrap or press a piece of parchment against the exposed cake to keep it from drying. If you have a cake dome or carrier, that’s perfect. It will last about 3-4 days in the fridge and still taste great. (Beyond that, the cake might start to dry out a bit, but honestly, it’s so moist it fares better than regular cake.)
- Freezer: Yes, you can freeze this cake! For best results, I suggest freezing individual slices. Place slices on a tray to freeze until solid, then wrap each slice in plastic wrap and foil, or put in a zip-top freezer bag (remove as much air as possible). This way, you can grab a single slice whenever a craving hits. Frozen, it’s best used within 2-3 months. To thaw, unwrap and place a slice on a plate in the fridge for a few hours or overnight. Or, in a pinch, you can thaw on the counter for 30-45 minutes (the cheesecake part will soften faster than the cake part). Enjoying a slice semi-frozen is actually like an ice cream cake – quite delightful on a hot day!
- Whole Cake Freezing: If you want to freeze a whole assembled cake, you can. Chill it well so the frosting is firm, then wrap, etc. But sometimes the decor (like berries) don’t freeze/thaw nicely, so it’s better to freeze without the fresh toppings and add those later. Thaw a whole cake in the fridge for at least 8 hours (overnight). Do not try to microwave or anything (melty disaster!).
Keeping it Fresh:
- When storing in the fridge, I often stick a few toothpicks on top of the cake (if it’s not tall) and tent foil or wrap over it, to avoid messing up the frosting. Or use a large airtight cake container.
- If the cake has sat out at room temp for a while (say during a party, it might sit out for 2 hours), it’s fine. After about 4 hours, because of the cream cheese, it should go back in the fridge. Although sugar acts as a preservative, we err on safety. Generally, a cake like this won’t last long on the table anyway 😋.
- Refreshing leftovers: After day 2 or 3, if the cake edges are a tad dry, you can microwave a slice for 10 seconds just to take the chill off – be careful not to actually warm it, or the frosting may start to melt. Alternatively, add a fresh spoonful of whipped cream or sauce to liven it up. Honestly, this cake stays moist really well thanks to the cheesecake, which kind of hydrates the cake layers over time. So you might find it’s superb even on day 3.
By taking advantage of these make-ahead tips, you can break the workload into manageable bits and have a stress-free serving day. And by storing it properly, you can savor this dessert over several days. (Midnight snack from the fridge, anyone? I’ve done it – no regrets.)
Now that you’re equipped with all this knowledge, you are truly ready to conquer the Layers of Love Strawberry Cheesecake Cake. I hope you enjoy both the process of making it and every single bite thereafter!

Conclusion
There you have it – Layers of Love in the form of an irresistible Strawberry Cheesecake Cake! This dessert is truly worth every bit of effort: it’s the kind of dish that gets recipe requests, the one that guests talk about long after the party. Why settle for ordinary when you can have a cake that delivers two amazing desserts in one slice? The combination of flavors and textures – fluffy strawberry-kissed cake, silky cheesecake, and tangy cream cheese frosting with juicy berries – is a total knockout. It’s almost too pretty to eat, but trust me, you’ll be glad you did.
In summary, this cake is a showstopping homemade cake that tastes as if it came from an upscale bakery. Yet, you pulled it off in your own kitchen (high five!). It’s the perfect choice for when you want to impress at a potluck, celebrate a special occasion with a showstopping cake, or just treat yourself and your loved ones to the ultimate dessert. The recipe is straightforward if you take it step by step, and it’s also wonderfully adaptable to various diets or preferences. From being a perfect party dessert to a make-ahead lifesaver, this Strawberry Cheesecake Cake checks all the boxes.
I encourage you to give it a try – you don’t need to be a professional baker to succeed here, just a lover of delicious cake! Once you taste that first forkful, you’ll understand why I boldly claim it might ruin you for all other desserts. 😄 It’s that good.
Thank you for reading along and baking with me. If you do make this cake, I’d love to hear how it turned out for you. Feel free to share your experience, tweaks, or serving ideas. Did it wow your family as much as mine? Any questions pop up during your baking process that I can help with? Drop a comment below and let’s chat about it. And if you snapped a photo of your gorgeous creation, share it! Nothing makes me happier than seeing others enjoy a recipe I adore.
Happy baking, and enjoy every blissful layer of this sensational cake!
FAQ Section
Here are some frequently asked questions about this Strawberry Cheesecake Cake, along with my answers. Hopefully these will clear up any final details and help you customize the recipe to your needs.
- Q: Can I make it with Greek yogurt?
A: Yes! Greek yogurt can be a great addition. You can substitute Greek yogurt for the sour cream in the cheesecake layer one-for-one – it will add a lovely tang and extra protein. You can also use thick Greek yogurt (plain) instead of some of the cream cheese in the cheesecake if you’re trying to lighten it up, but don’t swap out more than half of the cream cheese or the texture may suffer. In the frosting, a couple tablespoons of Greek yogurt can lighten the texture, but again, not too much or it could get runny. If you want to use Greek yogurt in the cake batter, you could replace 1/4 cup of the milk with yogurt for a more tender crumb. Using Greek yogurt is a smart way to create a slightly healthier strawberry cake while keeping it moist. Just stick to full-fat Greek yogurt for best results (as a non-fat yogurt could curdle or not provide the richness needed). - Q: Is this recipe gluten-free?
A: The recipe as written is not gluten-free (since it uses all-purpose flour in the cake). However, it’s very easy to make a gluten-free cake version. Simply swap the flour with a gluten-free all-purpose baking flour blend (one that is meant to replace regular flour 1:1). Many people have had success with brands like Bob’s Red Mill 1-to-1 Baking Flour or King Arthur Measure-for-Measure. Ensure your baking powder is gluten-free (most are, by default). The cheesecake layer has no flour, so that’s already gluten-free. If you plan to do the cookie crumble topping, use gluten-free cookies or omit the crumble. With these changes, the cake should turn out just as delicious and no one will guess it’s gluten-free. Always check all ingredient labels if cooking for someone with severe gluten intolerance. - Q: How can I make it dairy-free?
A: Making this dessert dairy-free is a bit of a project (since it’s so dairy-heavy), but it can be done! For the cheesecake layer, use a dairy-free cream cheese substitute – there are brands made from almond milk or soy that mimic cream cheese. Use full-fat coconut cream in place of sour cream/heavy cream. For the cake, swap the butter with a plant-based butter or margarine, and use almond milk or oat milk instead of dairy milk. Ensure any chocolate (if you use white chocolate decor) is dairy-free or omit it. The frosting can be made with dairy-free cream cheese and dairy-free butter as well; you might add a tablespoon of shortening or coconut cream to help it stabilize. Keep in mind the texture might be slightly different, but you will still get a tasty dairy-free dessert. If eggs are okay (usually yes for dairy-free since eggs aren’t dairy), keep those in; if you also need egg-free, see the next question. When working with dairy substitutes, it’s often helpful to follow a proven dairy-free cheesecake recipe for that layer, and then incorporate it here. - Q: Can I freeze it?
A: Absolutely! As discussed in Storage tips, this cake freezes very well. You can freeze the components (cheesecake, cake layers) separately or the assembled cake or slices. If freezing the whole cake, I suggest doing so without the fresh berry garnish (add fresh fruit after thawing, for best appearance). Wrap it tightly to prevent freezer burn. It’s best used within 2-3 months for optimal flavor, but technically it’s safe longer. To serve from frozen, let the cake thaw in the fridge overnight (for a whole cake) or for a couple hours (for slices). Some people even love to eat this cake slightly frozen – it’s like an ice cream cake treat! So yes, it is a very freezer-friendly cheesecake cake. This makes it great for planning ahead – you could bake it weeks in advance of an event, freeze, then thaw and add final touches. - Q: Can I add more flavor, like spices, herbs, or zest?
A: Go for it! While the strawberry and cheesecake combo is delicious on its own, you can definitely experiment with flavor boosters. A little lemon zest in the cake batter (say, 1 teaspoon) can brighten up the flavor and complement the strawberry nicely – strawberry and lemon are a great duo. You could also add lemon zest to the cheesecake batter for a mild lemony tang, or into the frosting. Spices: A pinch of cinnamon in the cake batter can add warmth (strawberry and cinnamon is an interesting pairing). I wouldn’t go overboard with spices because you don’t want to mask the strawberry, but a touch of cinnamon or even cardamom could be lovely. Herbs: Some bakers use basil or mint with strawberries. If you’re adventurous, you could finely chop a teaspoon of fresh basil or mint and stir it into the strawberry compote or even the frosting for a fresh twist. I’ve tried a strawberry-basil cupcake before that was amazing. Just use a light hand so it’s not overpowering. Another idea: a couple drops of almond extract in the cake or frosting can give a nice aromatic depth (almond extract is strong, so 1/4 teaspoon is enough). Essentially, you can treat this recipe as a canvas – adding a bit of citrus zest or a hint of spice can personalize it and make the flavor profile more complex. Do keep the balance of flavors in mind, but feel free to get creative. - Q: Can I use this as a layered birthday cake?
A: Yes, yes, yes! In fact, this would make a fabulous birthday cake (I’ve made it for a couple of family birthdays myself). Because it’s rich and special, it really feels celebratory. If using for a birthday, you might want to decorate it in a festive way: for example, add sprinkles around the edges or use candles that match the strawberry theme (maybe pretty pink candles). The structure of the cake is quite sturdy, so it can hold up to a few birthday candles on top easily. If you want more than two cake layers (for an extra-tall birthday cake), you could slice each cake layer in half horizontally, making four thinner cake layers with the cheesecake in the middle (this requires careful slicing, but it’s doable if the cakes are well-chilled and you have a long serrated knife). Then you’d have cake, cheesecake, cake, cheesecake, cake – wow! Alternatively, you could double the recipe to have four cake layers with two cheesecake layers (that would be epic, but ensure your cake tier is stable or use dowels for support like a tiered cake). But the standard version is already tall and impressive. Write a “Happy Birthday” message on top with some melted chocolate or colored frosting, or simply use a topper. It’s certainly suitable as a layered birthday cake – just be ready for everyone to ask for seconds! - Q: Can I replace the compote with jam?
A: Definitely. Using strawberry jam is a smart shortcut if you don’t have time to make the compote. A good-quality store-bought strawberry jam or preserves can mimic that layer of fruity goodness. Simply spread a thin layer of jam on the cake as you would the compote. If the jam is very thick, you might warm it slightly to make it spreadable. You could even stir in a squeeze of lemon to the jam to brighten it, or a few fresh chopped berries to get a bit of texture. Using jam will save you a step and still provide that moisture and burst of strawberry between layers. I often do this when I’m in a hurry – it truly works like a charm. Another benefit of jam: it’s already sweet and concentrated, so a thin layer is enough. In the summer when berries are abundant, I’ll do homemade compote, but in the winter, jam is my go-to. So yes, feel free to replace the compote with jam – it’s a perfect substitution and no one will complain. In fact, many classic recipes use jam in exactly this way. It’s all about making the recipe work for you.